How to add storage to vmware esxi 6 using vCenter Server
How to add storage to vmware esxi 6 using vCenter Server
In this post, we’ll learn the steps to add storage to VMWare ESXi 6 using vCenter Server. In the old posts, we have already learned the steps to install and configure vmWare ESXi 6 and installation of VMWare vCenter Server. When we have multiple VMWare ESXi hosts then adding SAN Storage i.e. Shared Storage would result in high availability even if one VMWare ESXi host goes down.
We have already created iSCSI Target Server which is acting like a SAN Storage. We’ll use the same Shared Storage to connect with ESXi hosts.
Steps to connect to iSCSI target Server using vCenter Server
Step 1:
Login to vCenter Server (Steps to install vCenter Server)
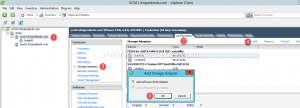
Select the Host name on which you want to connect the SAN Storage.
Select Configuration tab. This is the tab that Administrator would be using most of the time.
Select Storage Adapters.
Click on Add.
A popup will show an option to add “Software iSCSI Adapter” and “Software FCoE Adapter”. For this practical we need to select “Software iSCSI Adapter” and then click on Ok to add the same.
Step 2:
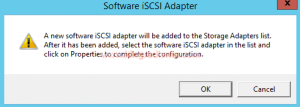
Another message will show that “A new Software iSCSI adapter will be added to the Storage Adapters List”. Click on Ok to add the same.
Step 3:
A new iSCSI Software Adapter would be added.
Select the adapter and then click on Properties to configure the same.
Step 4:
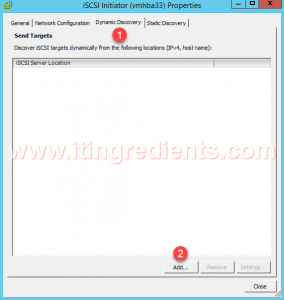
On the iSCSI Initiator properties window, go to the “Dynamic Discovery” tab.
Click on Add.
Step 5:
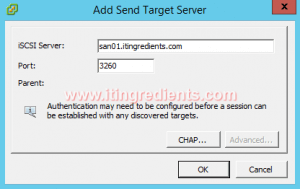
On the “Add Send Target Server” console, define the name or IP Address of iSCSI Server.(Steps to create iSCSI Target Server using Windows Server 2012 R2)
Default port to connect to SAN Storage is 3260.
Click on Ok to connect to shared storage.
Click on Close to close the properties window.
How to configure iSCSI Target Server on Windows Server 2012 R2
Step 6:
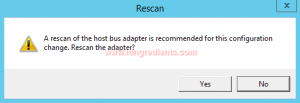
A popup window would ask to “Rescan the adapter”.
Click on Yes to rescan the Adapter.
Step 7:
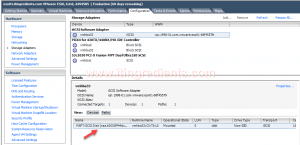
Once rescan is completed successfully, it would show list of all the Shared storages available to use.
Steps to add Storage to VMWare ESXi 6 using vCenter Server
Step 1:
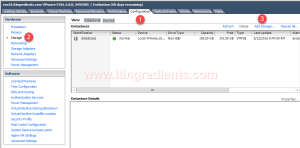
To add Storage to VMWare ESXi 6 using vCenter Server, go to “Configuration” tab.
Click on Storage.
Click on “Add Storage”.
Step 2:
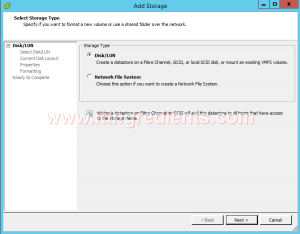
Out of two options available i.e. “Disk/LUN” and “Network File System”. Select “Disk/LUN”.
Click on next to continue.
Step 3:
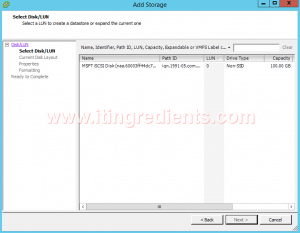
On the select Disk/LUN window, we can see list of all the SAN Storages that are available to use.
In this practical, we can only see one SAN Storage with the capacity of 100 GB.
Select the same and click on next twice.
Step 4:
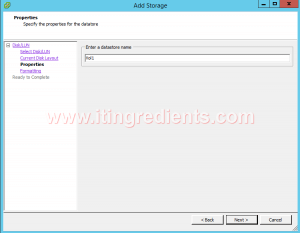
Enter the datastore name that you wan to define.
To make it simple, we have defined the name of datastore as VOL1. You can define the same as per the naming convention you want to use.
Click on next.
Step 5:
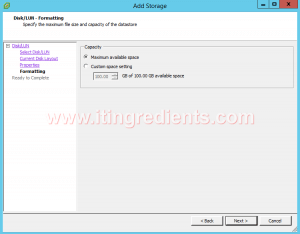
Define the capacity of Disk/LUN.
We can either define maximum available space or we can define custom space.
For this practical, we’ll use maximum full space.
Step 6:
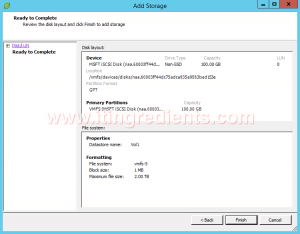
Review the Disk Layout and File System.
This partition will use VMFS-5 file system and can support upto 2.00 TB of file size.
Click on Finish to add storage in VMWare ESXi 6 using vCenter Server.
Step 7:
A newly added Shared storage would be visible in Storage with the name as VOL1.
Follow the same steps on all other VMWare ESXi hosts. Hope you understood the steps to add storage to VMWare ESXi 6 using vCenter Server. Please feel free to leave your comments and suggestions in the comment section.



I used these steps to add iscsi storage to Vmware esxi shall I follow the same steps to add NFS to Vmware ESXi or steps are different ?