
Step by Step – How to Configure Azure Front Door for Web App
Step by Step – How to Configure Azure Front Door for Web Application
In this article, we’ll learn the steps to configure Azure Front Door for Web Applications. Azure Front Door is Microsoft’s cloud Content Delivery Network (CDN) designed to provide fast, reliable, and secure access to your applications’ static and dynamic web content globally.
It is critical to understand the difference between Azure Front Door and Azure Application Gateway before you deploy Azure Front Door for your environment or for the cutomer.
In this example, let’s assume we have have two Azure Web Applications deployed in Azure. Let’s start with the steps to configure Azure Front Door for Azure Web App.
1. On the top search box, search for the Azure Front Door and select “Front Door and CDN Profiles“. On the “Front Door and CDN profiles” click on create to create the Azure Front Door.
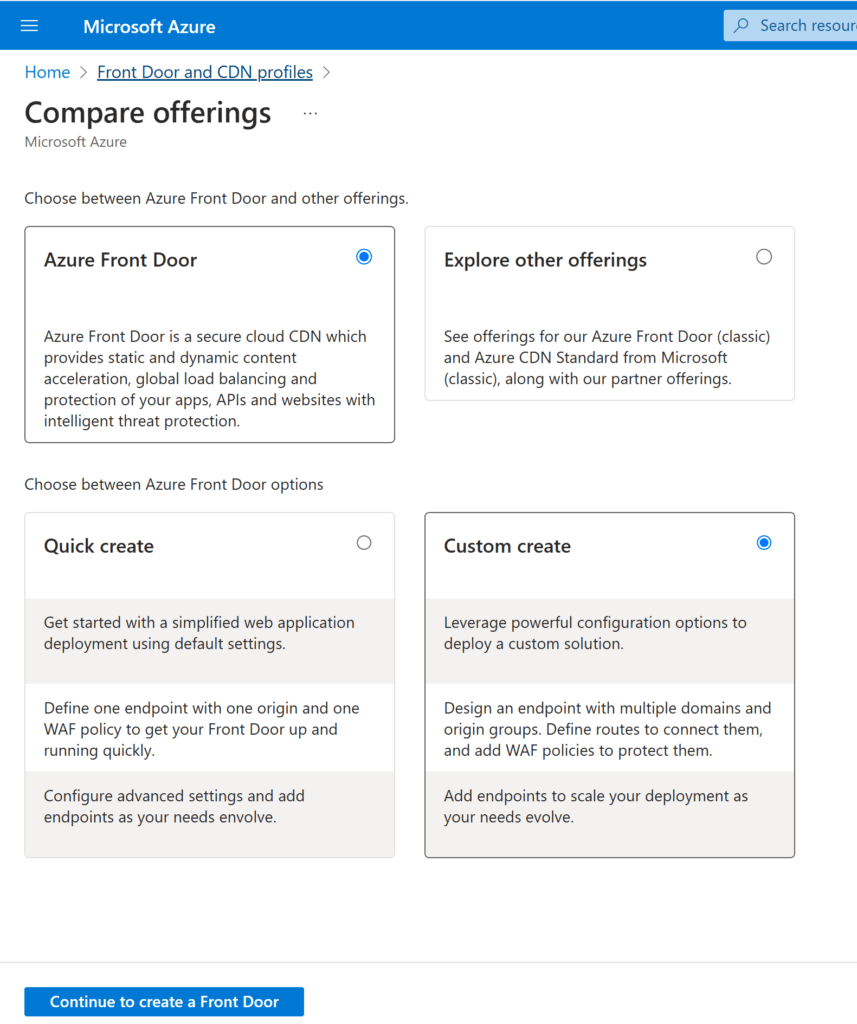
2. On the compare offering page select “Azure Front Door” and “Custom Create” and then click on “Continue to create a Front Door“.
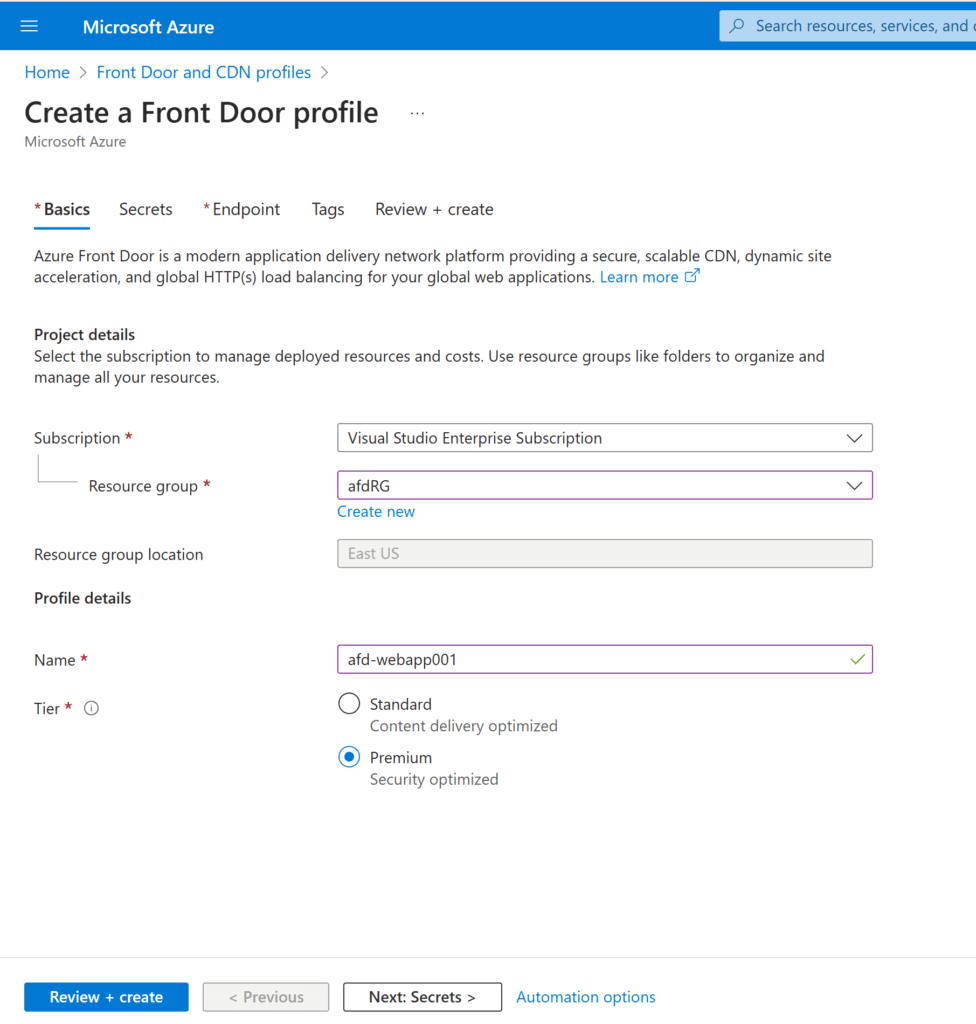
3. On the “Create a Front Door Profile” page define the name of the Subscription, Resource Group, Resource Group Location, Name of the Azure Front Door and Tier. In this example, we’ll select Premium tier.
4. Click on Next for Secrets.
5. On the Endpoint page, click on “Add an endpoint“. Endpoint is the URL created by the Azure Front Door to access the backend Pool/Origin.
6. Define the EndPoint name and click on add. Please ensure “Enable this endpoint” is selected, click on “Add”.
7. On the “Create a Front Door Profile” page click on “Add a route“.
8. Define the name of the route, select the name of the Domain, which is the endpoint in this example. Select the accepted protocol i.e. HTTP, HTTPS or both depending on your requirement. Click on “Add a new origin group“.
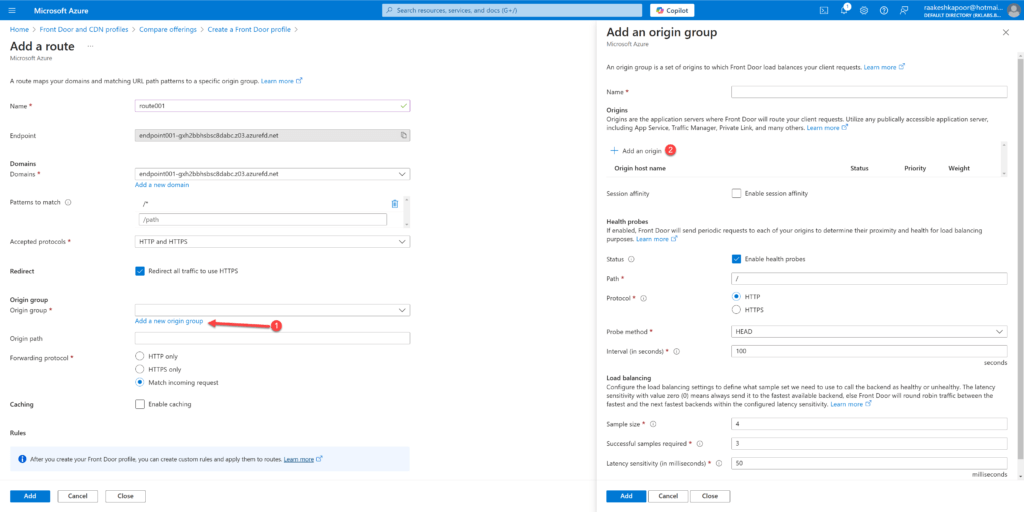
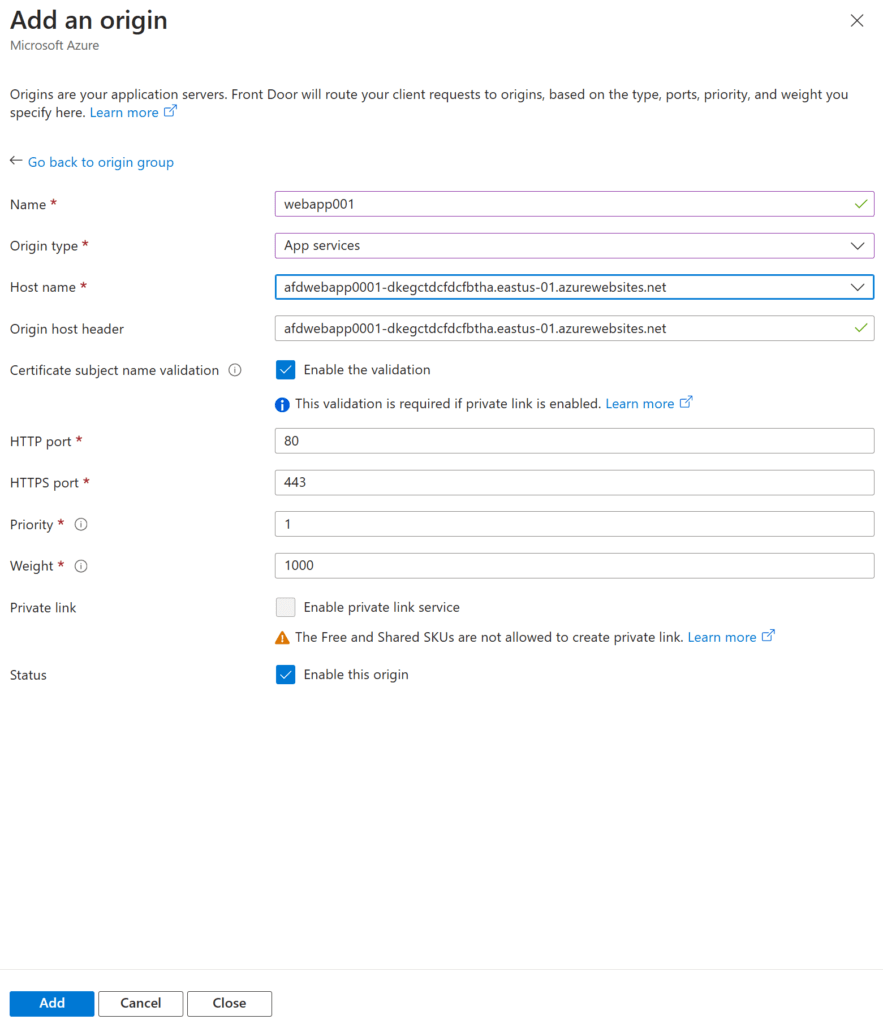
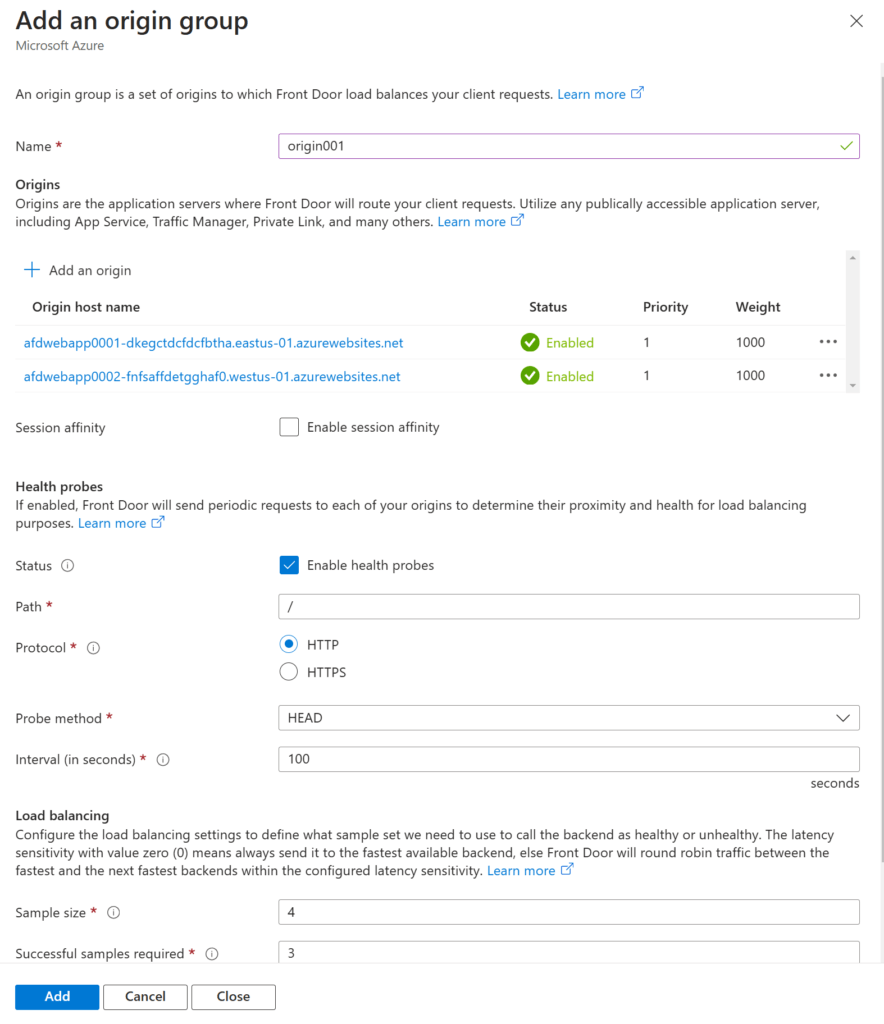
9. On “Add an origin group” page, click on “Add an Origin” and define the Name of origin, Origin Type (such as storage, Cloud service, App services, Static Web App, API Management, Application Gateway, etc). Origin type in this example is App Services and select the Host Name and leave the default settings and click on Add.
10. Once the first orgin is added and if you have multiple Origins then follow the same process to add all other Origins and then click on “Add”.
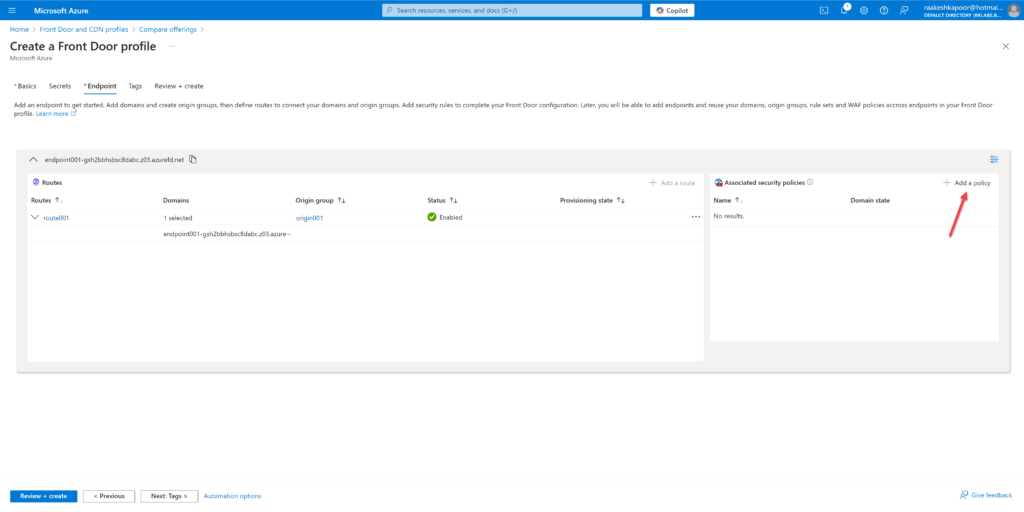
11. On the “Create a Front Door Profile” page click on “Add a Policy” and define the Web Application Firewall (WAF) policy name.
12. Define the Tag if required, click on next.
13. On the “Review + Create” page, reivew all the details and then click on Create to create the Azure Front Door.
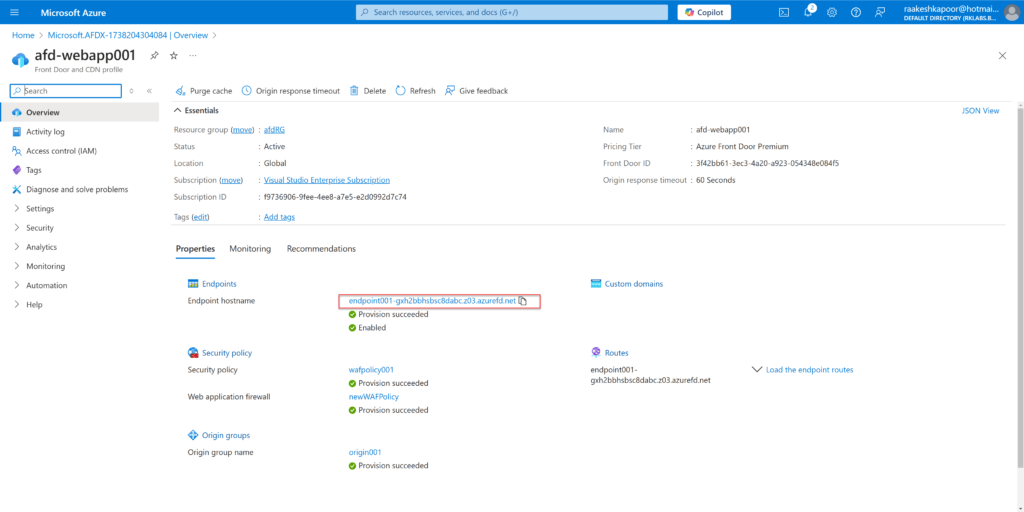
14. Wait for few minutes and then try accessing “Endpoint hostname”.
Conclusion: I hope this blog was helpful and helped you with the steps requierd to configure Azure Front Door. Feel free to leave your comments if you have any clarification question or need more information.