How to install Read Only Domain Controller 2012 R2
How to install Read Only Domain Controller 2012 R2
In this post, we’ll learn the steps to install read only Domain Controller 2012 R2. A read-only domain controller is a server that host a read-only copy of active directory which is hosted from any writable domain controller in the domain. Information stored on RODC has been authenticated to the authorized users and computers only. RODC will forward the access and authentication requests to the writable domain controller because the newly RODC cannot authenticate the users and computers.
Before we install Read only Domain Controller 2012 R2, please ensure you have writable copy of DC in your Domain. You cannot create RODC if you don’t have writable DC in your Domain.
Steps to promote a Domain Controller
Steps to install read only Domain Controller 2012 R2
In our environment, we have two servers. First, is a writable Domain Controller (DC01) and second is the member server (DC02) i.e. we have added second sever in the Domain. Before we start with the process of promoting a RODC.
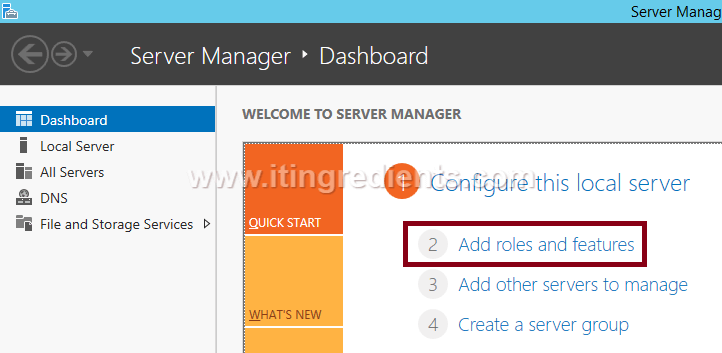
1. On second server i.e. DC02, open “Server manager“, click on Add roles and features to install the Active Directory Domain Services role.
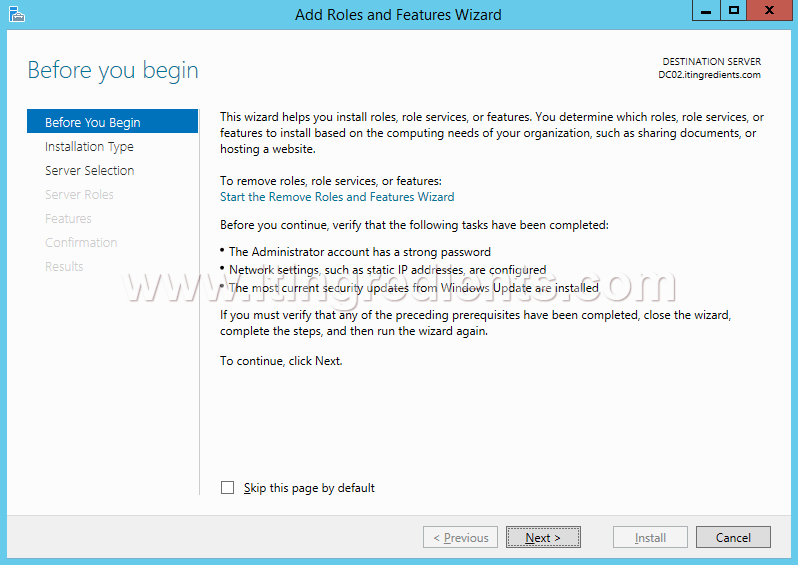
2. On “Before you begin” console, we can read all the pre-requiste tasks to be performed before proceeding further. Before installing any role, please verify that administrator account must have a strong password, network settings such as static IP address is configured. Click on next.
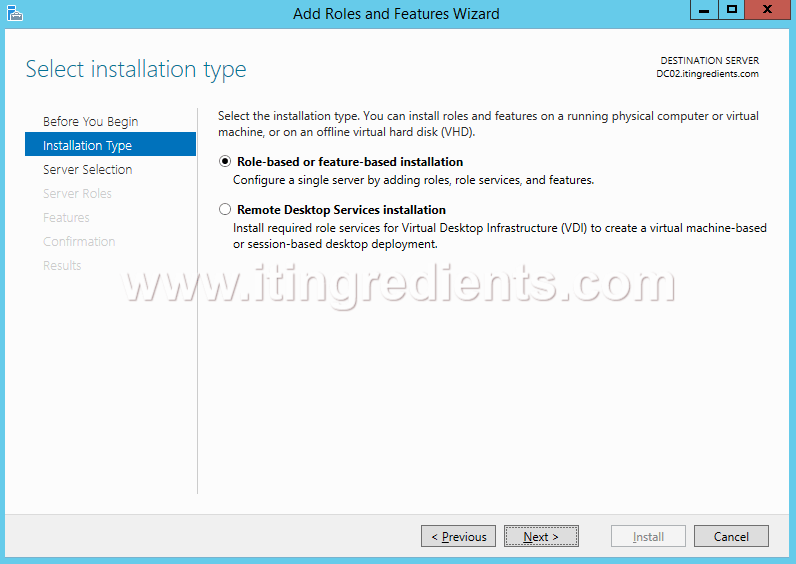
3. On “Installation Type” console, Select Role-based or feature-based installation. Click on Next.
4. In Windows Server 2012 R2, we have an option to manage servers remotely. In the server pool we can see all the remotely managed servers but here only one server is listed. Select the server on which you want to install RODC 2012 R2. Click on Next.

5. Select “Active Directory Domain Services” role to install on selected computer. AD DS is like a store which keeps all the information related to objects in a network and makes the information available to users & domain administrators. Click on Next to continue.
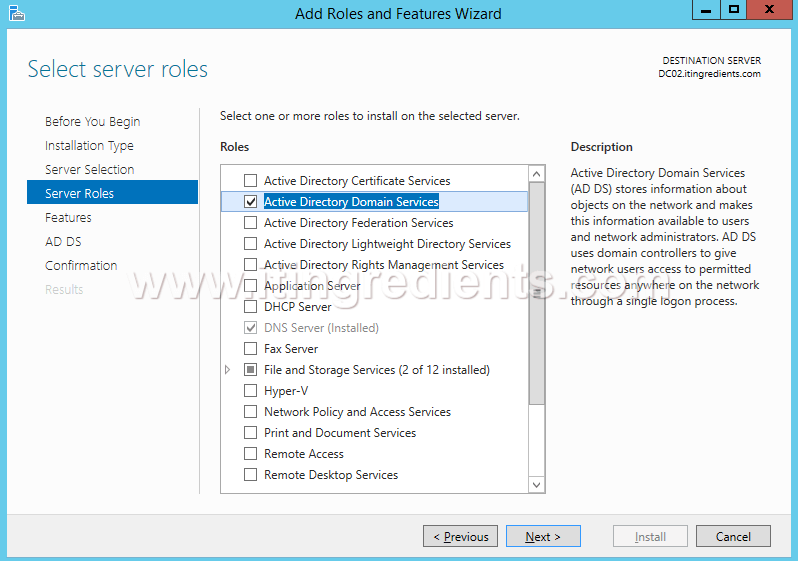
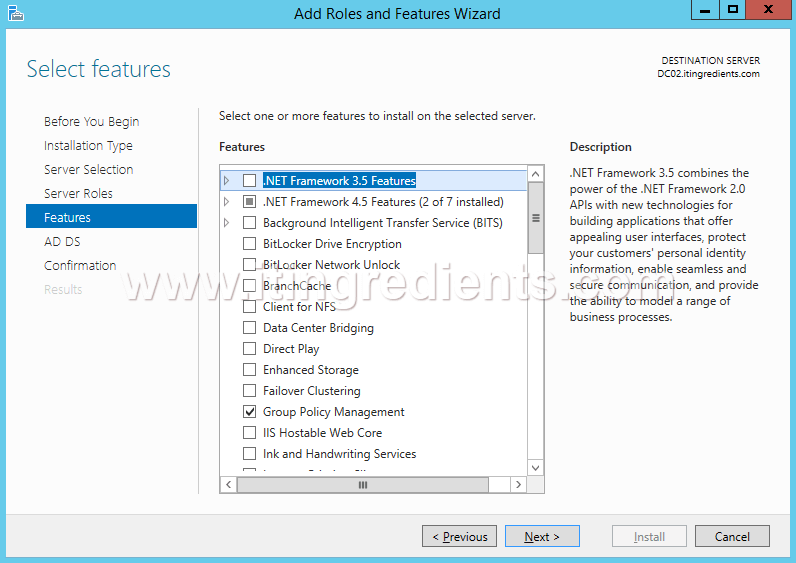
6. All the essential features required with AD DS role are already selected. Cick on Next to continue the installation process.
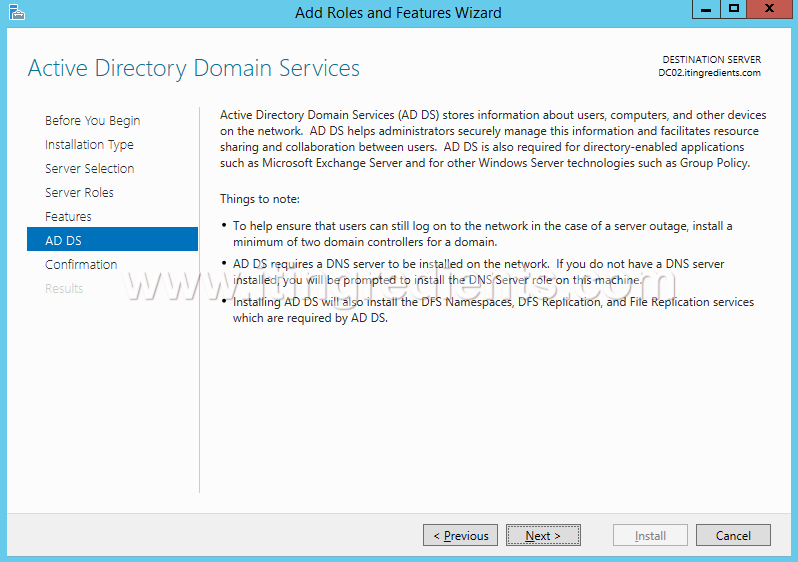
7. On “Active Directory Domain Services”console is explaining the importance of AD DS role. Click on Next.
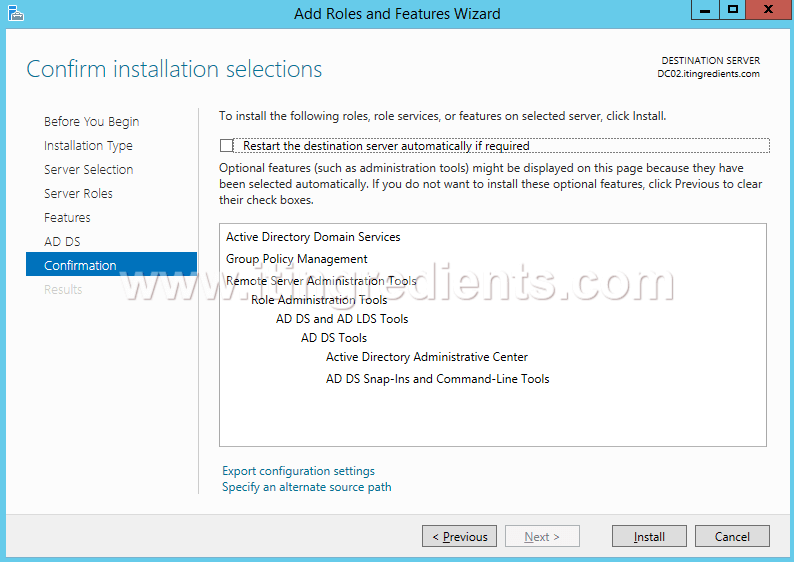
8. It confirms all the selected components which are required for AD DS role. It would also suggest restart the destination server automatically if required. Click on Install to continue.
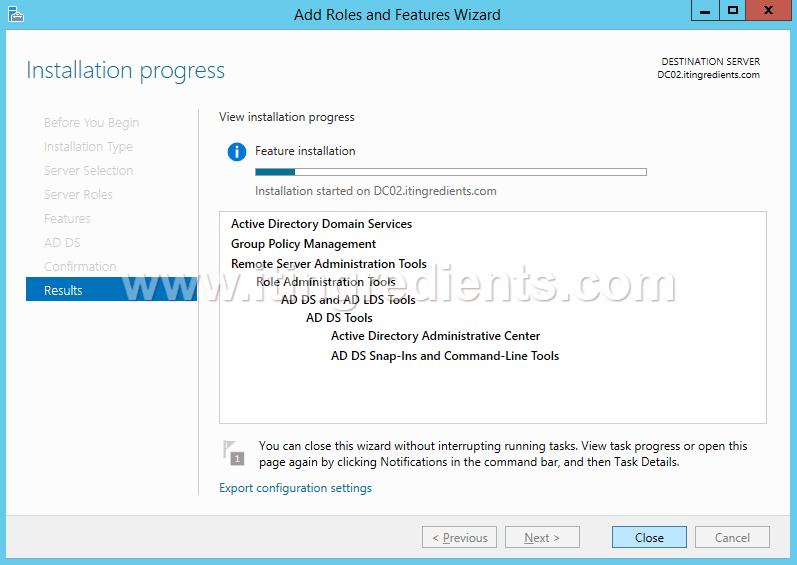
9. This console shows the installation in progress and after completing the installations click on Close to close this wizard. However, you can close the console while installation is in process as it would not interrupt the installation of AD DS role.
10. Installation of AD DS role is a prerequisite to promote a server as DC. On the dashboard of Server Manager, we can see a warning sign, click on that sign and then click on “Promote this server to a Read only domain controller”.
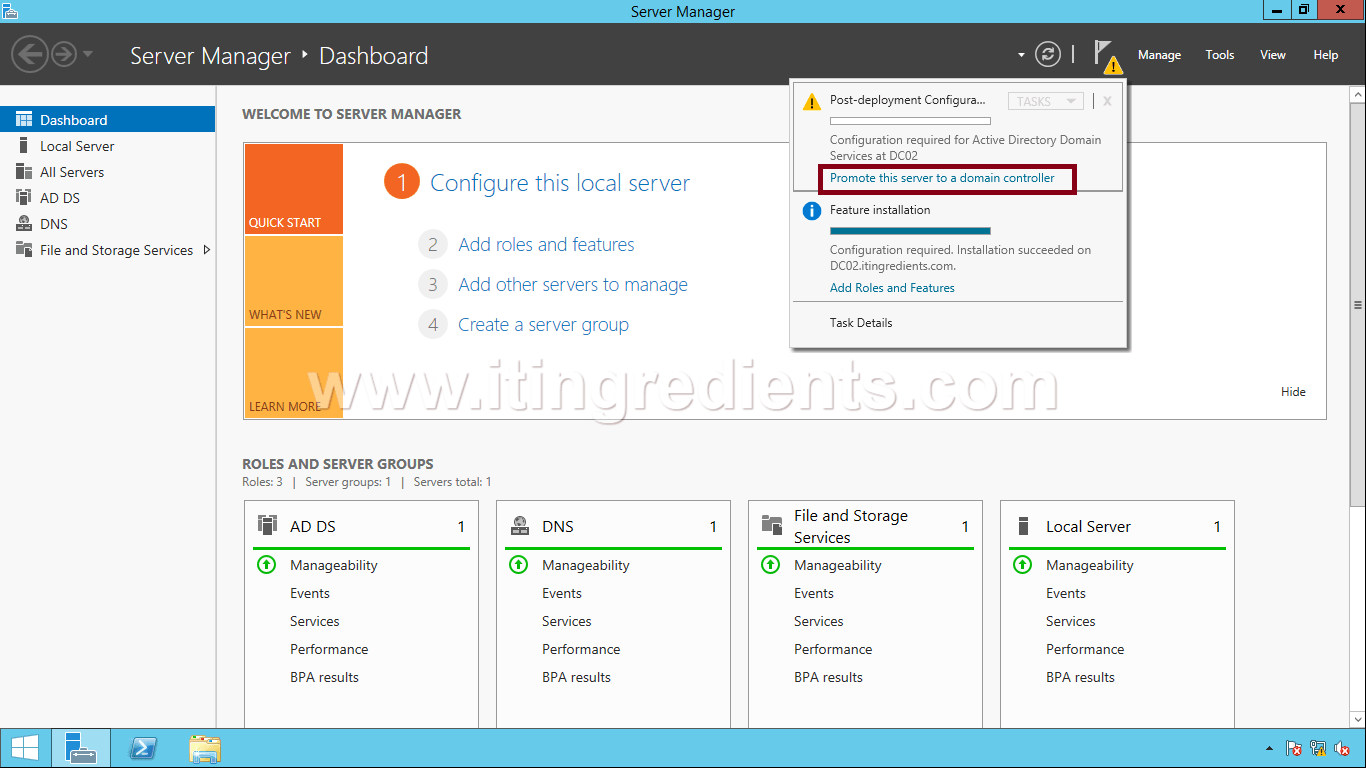
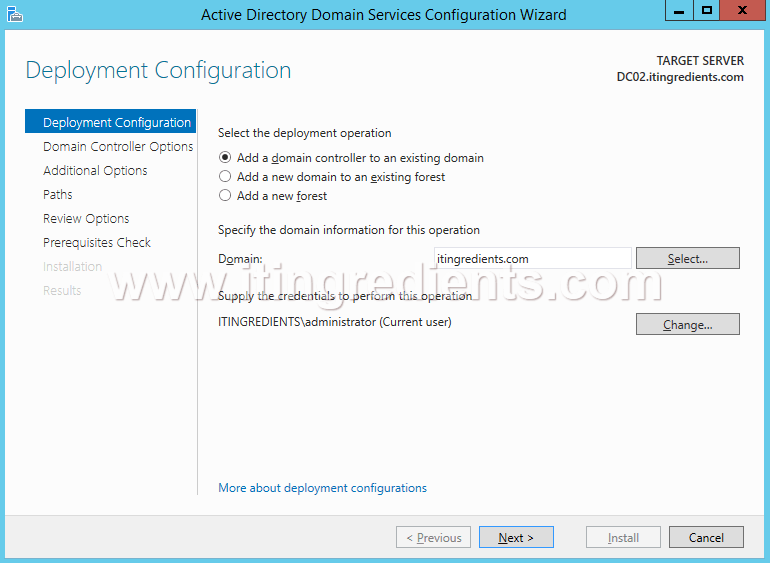
11. It will open “Active Directory Domain Configuration Wizard” window. In the “Deployment Operation” we’ll see three options “Add a domain controller to an existing domain“, “Add a new domain to an existing forest” and “Add a new forest“.
As we are creating RODC therefore we need to select “Add a domain controller to an existing domain”. Click on Next.
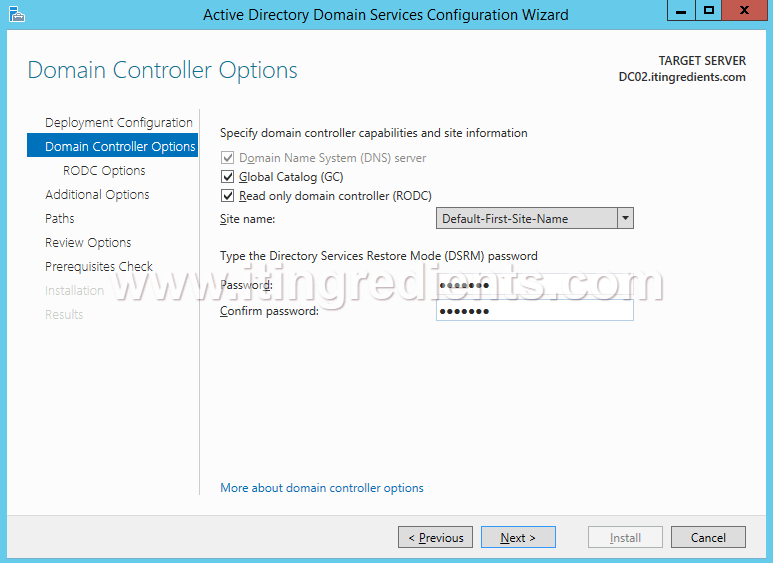
12. To make this computer RODC, we have to check the RODC option. We also have to set the Directory Services Restore Mode (DSRM) password here, before proceeding. Click on Next to continue.
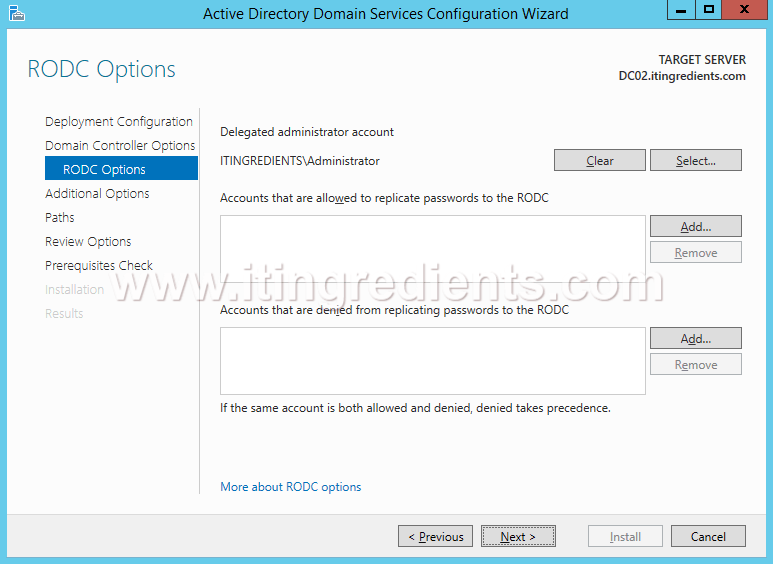
13. On “RODC Options” console, We have added ITIngredients\Administrator in delegated administrator account option. Click on Next. In this console, you can allow or deny the accounts for which password would be replicated. Please take a note, only allowed accounts would be authenticated via RODC.
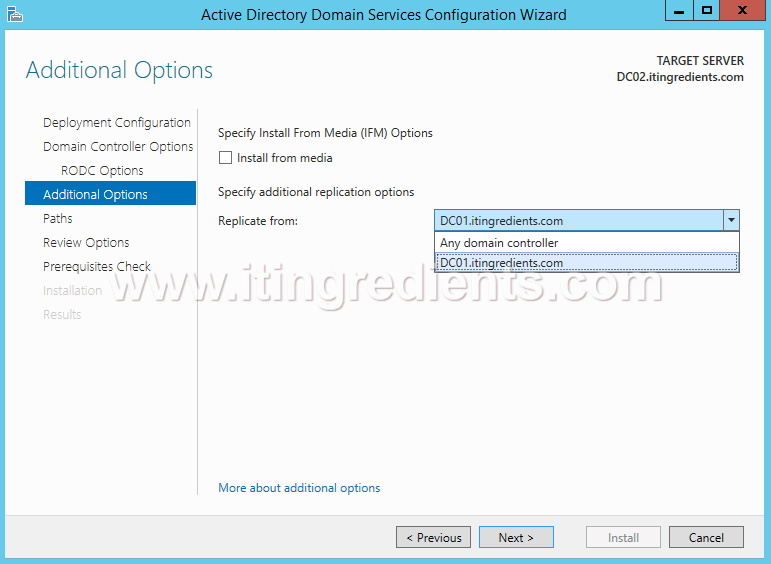
14. On the Additional Options console, beside Replicate from option, click the drop-down box and click on DC01.itingredients.com. This option will make this RODC to replicate from DC01 or you can select the option of Install From Media (IFM). We will discuss about IFM in future post. Click Next.
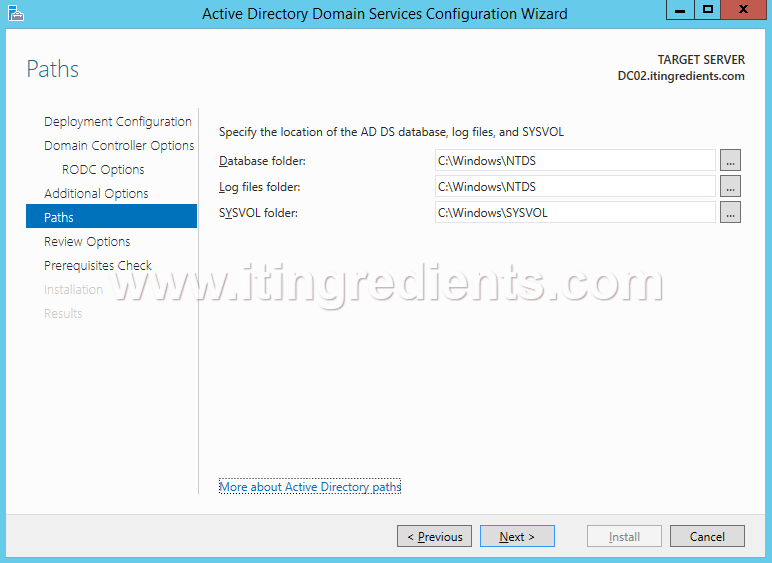
15. In the “Active Directory Domain Services Configuration Wizard” window we need to specify details of “Database Folder” i.e. NTDS.DIT file, “Log files folders” and “SYSVOL folder”. You can change the path if you want or click on Next to continue with the default selections.
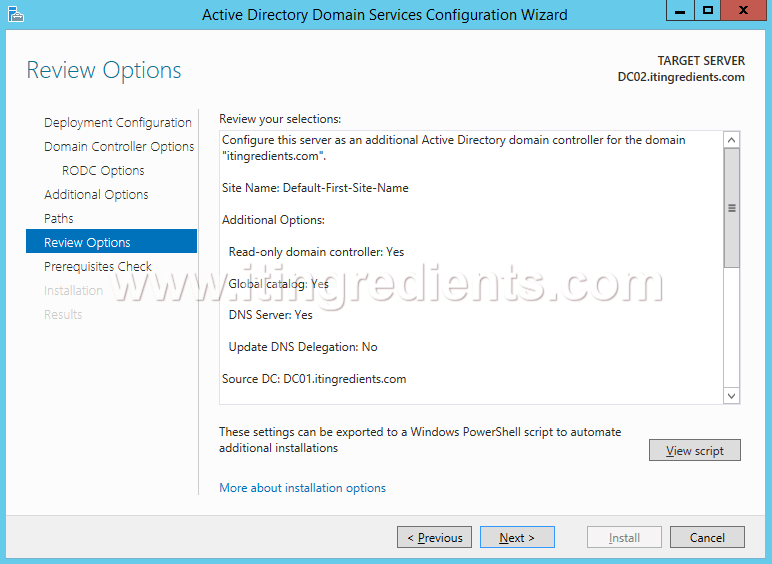
16. In the “Review Options” window, review all the settings that we have defined. Click on previous button, in case of any changes required else click next.
17. In “Prerequisite Check”, it will check all the prerequisites and will show error or warning. Click on install.
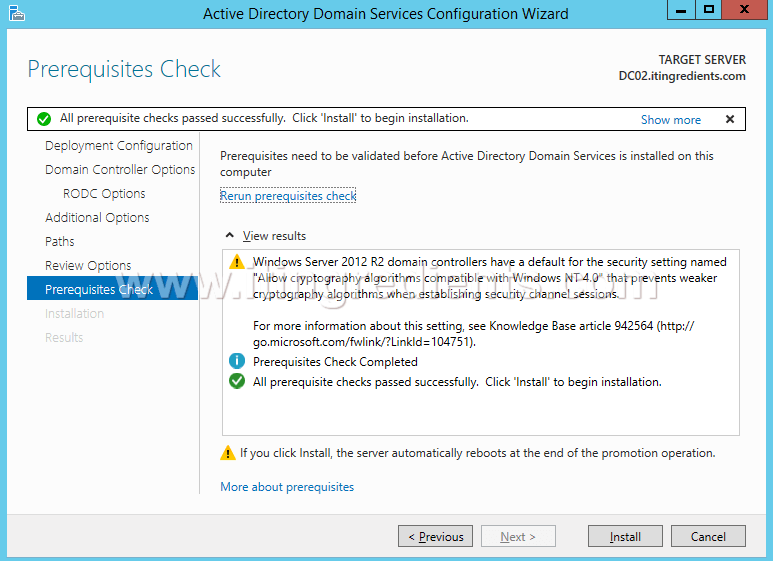
18. Reboot is required to complete the installation process.



Thanks for this wonderful article to create Read Only Domain Controller. Do we need to create a Writable Domain Controller to create the RODC or it can be created without creating the Writable Domain Controller? Early reply would be appreciated
You need to promote a Domain Controller before you promote a RODC. RODC is only a readable Domain Controller and it cannot be created without Writable Domain Controller. Hope it helps.
If I’ve multiple sites and at each location I have multiple domain controllers then where shall I host my RODC (Read Only Domain Controller). I need to place it on the First site or it needs to be placed at each site.