

Steps to Create Azure Virtual Machine using Azure Portal
Steps to Create Azure Virtual Machine using Azure Portal
In this article, we’ll learn the steps to create Azure Virtual Machine using Azure Portal i.e. https://www.portal.azure.com
1. To create Azure Virtual Machine, open a browser and go to https://www.portal.azure.com.
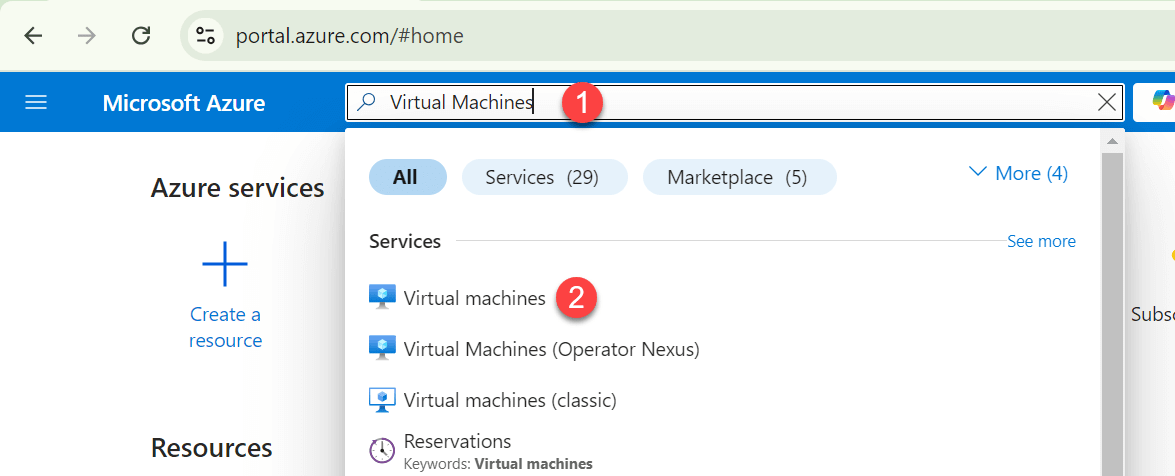
2. To create a Virtual Machine either click on the 3 lines on the top life hand side and click on Azure Virtual Machines or click on search and type “Virtual Machines”. Click on Virtual Machines.
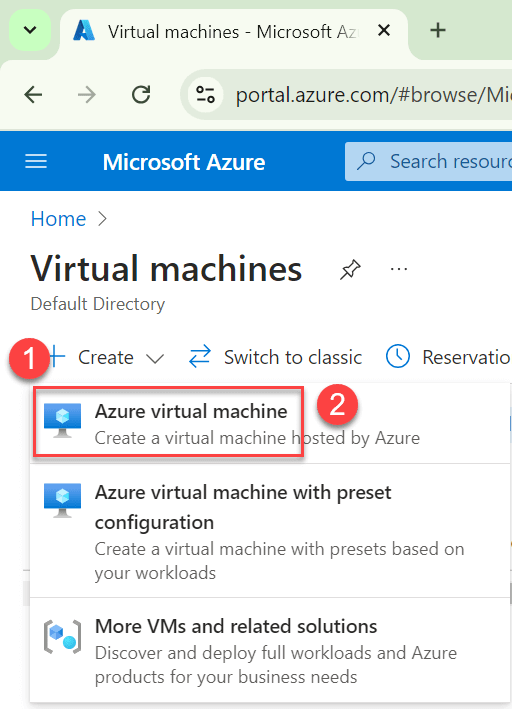
3. Click on Create and then click on “Azure Virtual Machines“.
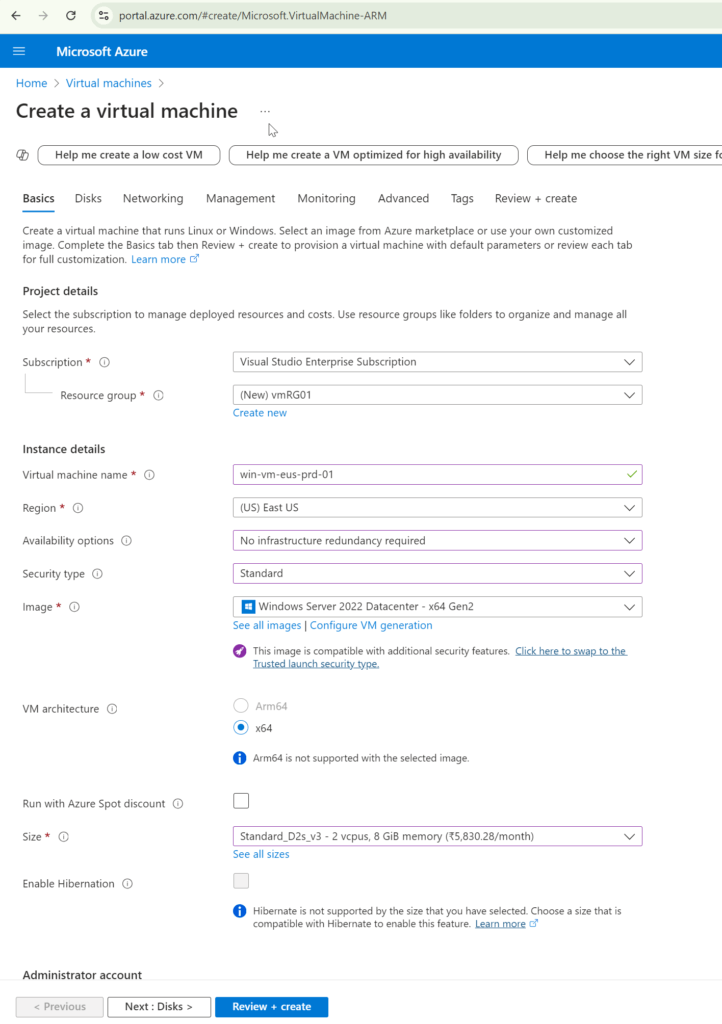
4. Select the Subscription in which you wanted to create a Virtual Machine, if you have multiple Subscriptions.
5. For Resource Group, click on “Create new”, type the name of the Resource Group and click on OK.
6. Type the “Virtual Machine Name” e.g. win-vm-eus-prd-01.
7. Select the region in which VM is to be created for this example we are hosting the VM in East US region.
8. For the “Availability Options” select “No Infrastructure redundancy required”.
9. For Security, select Standard.
10. For Image, click on “See all images” and select the OS Image that you wanted to deploy. For this example, we have selected Windows Server 2022 Datacenter – x64 Gen2.
11. Select the Size of a VM, which you wanted to use. For this example I have selected D2s_v3.
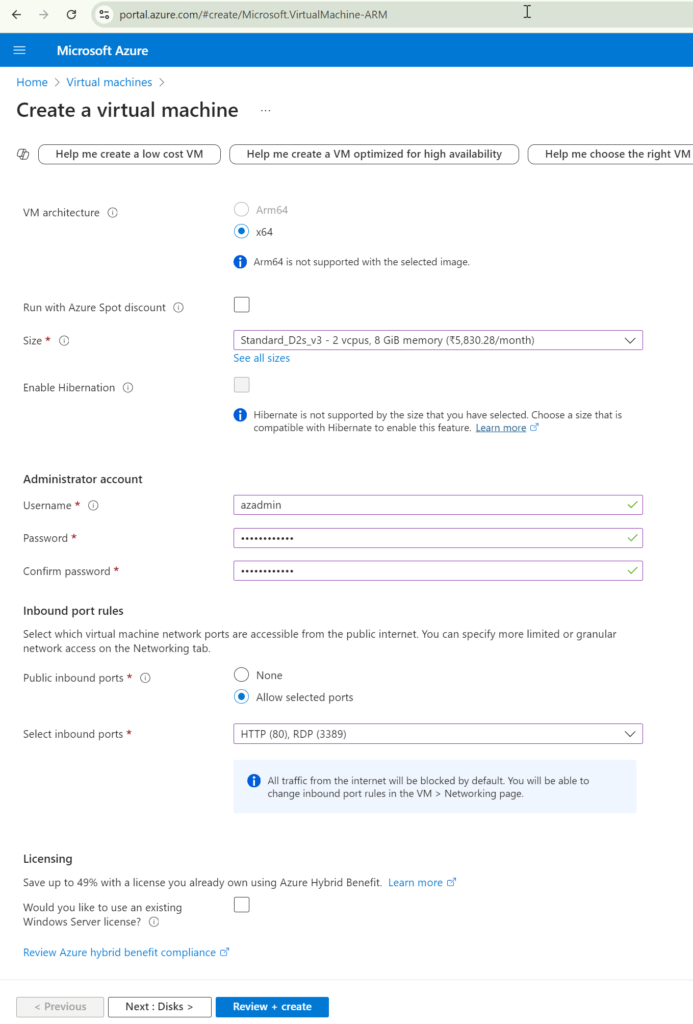
12. Type the username and password of the VM. The value of the password must be between 12 and 123 characters long.
13. For the Inbound port rules, click on “Allow selected ports“. Click the drop down of “Select inbound ports” and select the Ports which you wanted to allow such as RDP (3389), HTTP (80).
14. Click on Next.
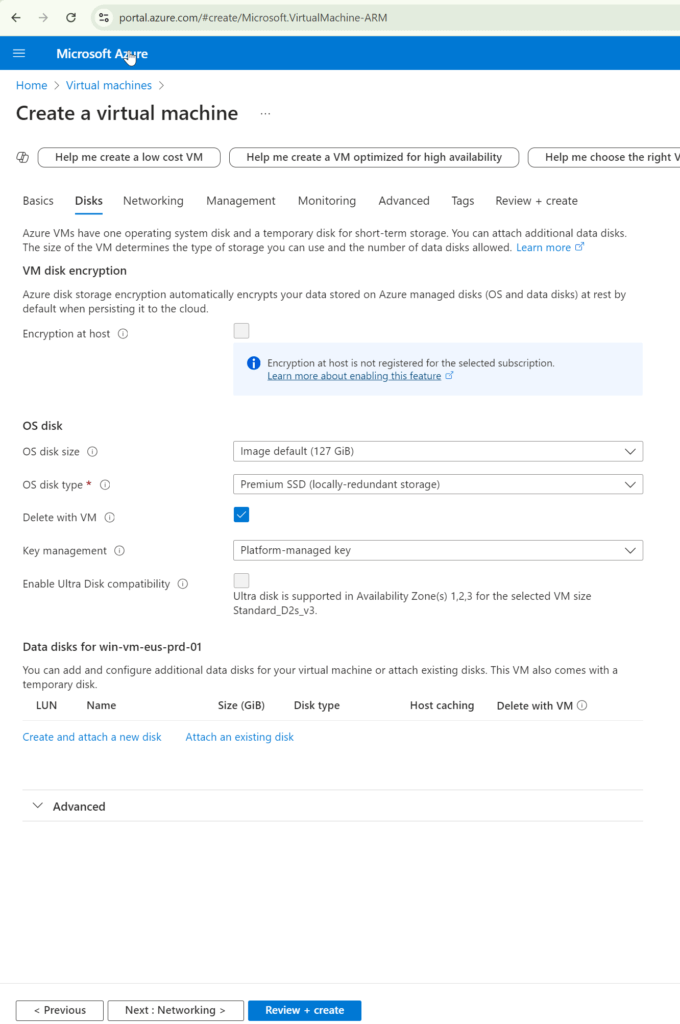
15. Change the OS disk size if any changes are required, else click on next.
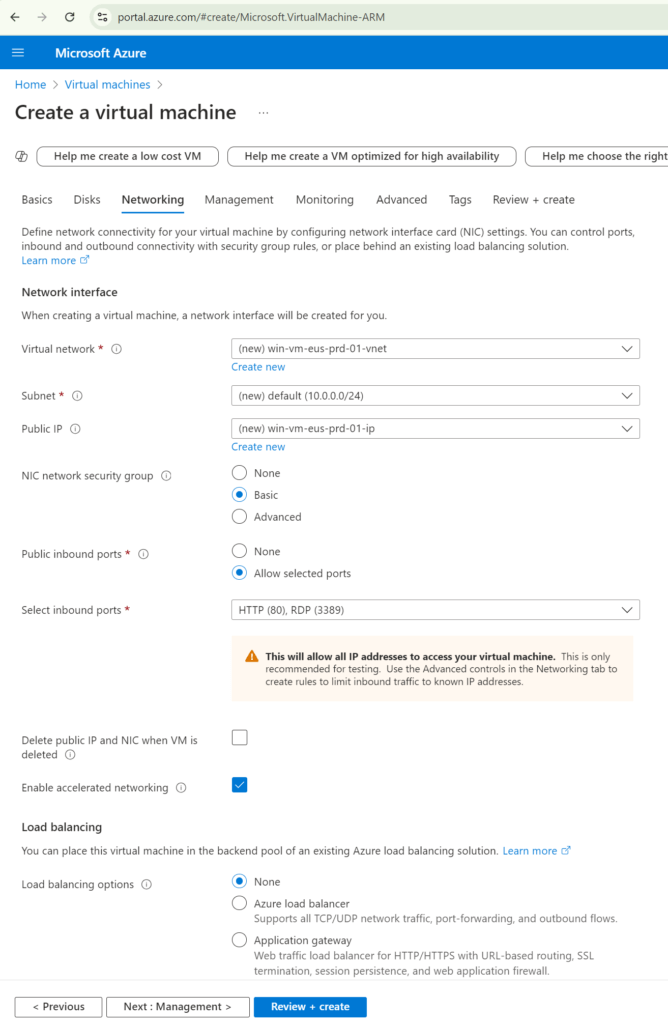
16. No changes are required for the Networking tab, however, in future articles I’ll explain detailed information about the Virtual Networks and Subnets. Click on next.
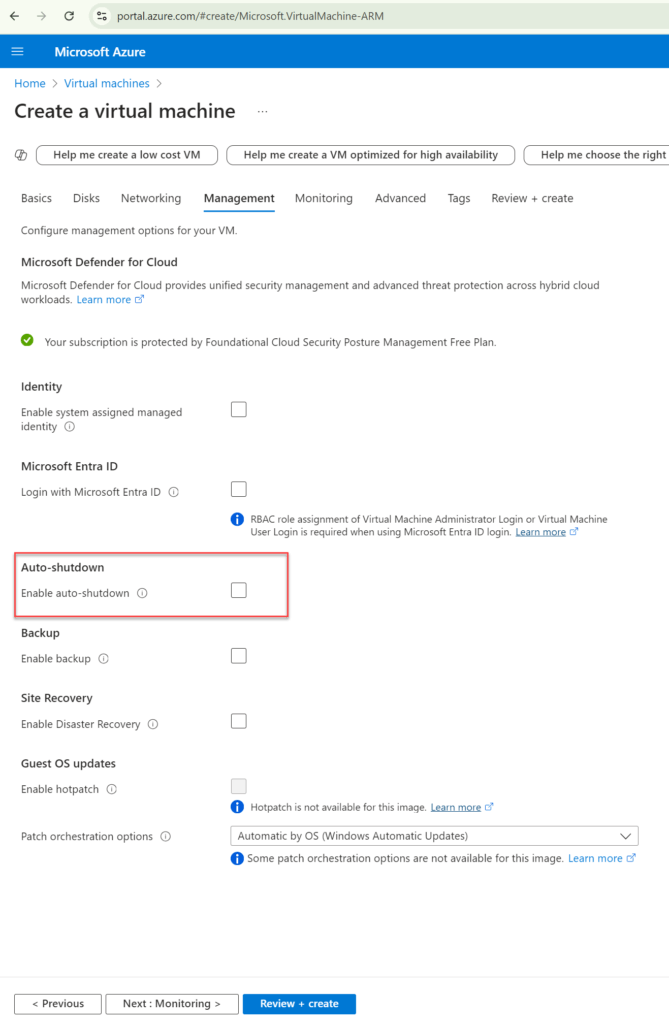
17. On the Management tab, no changes are required. You can enable Auto-shutdown if you want this VM to shutdown at a specified time. Once configured, click on next.
18. On the Monitoring tab, do not changes are required. Click on next.
19. On the Advanced tab, no changes are required. Click on next.
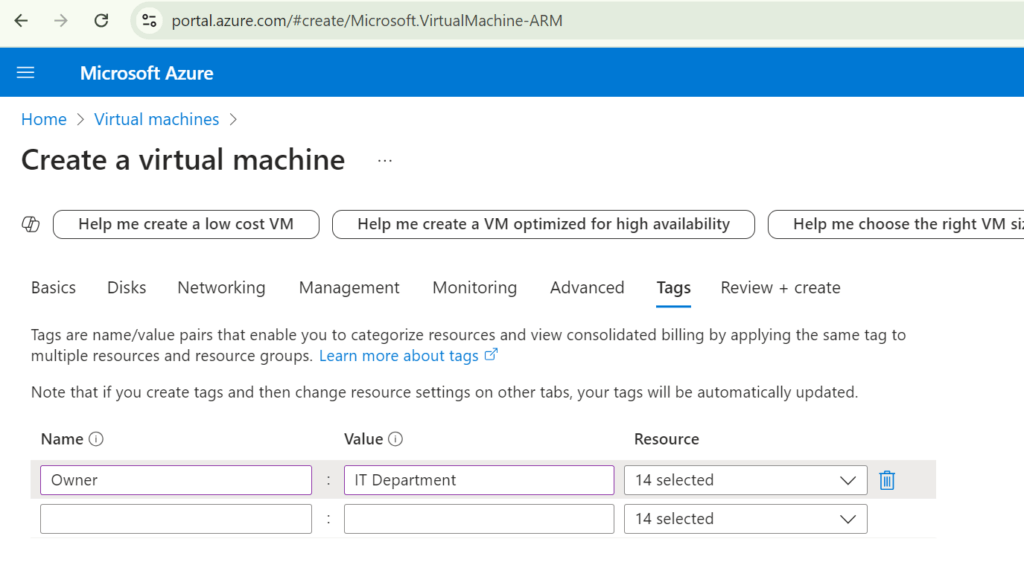
20. On the Tags tab, define the Name and Value of the tags. For this example, we’ll use Name as Owner and Value as “IT Department”. This is an example, you can define the Tag as per your requirements.
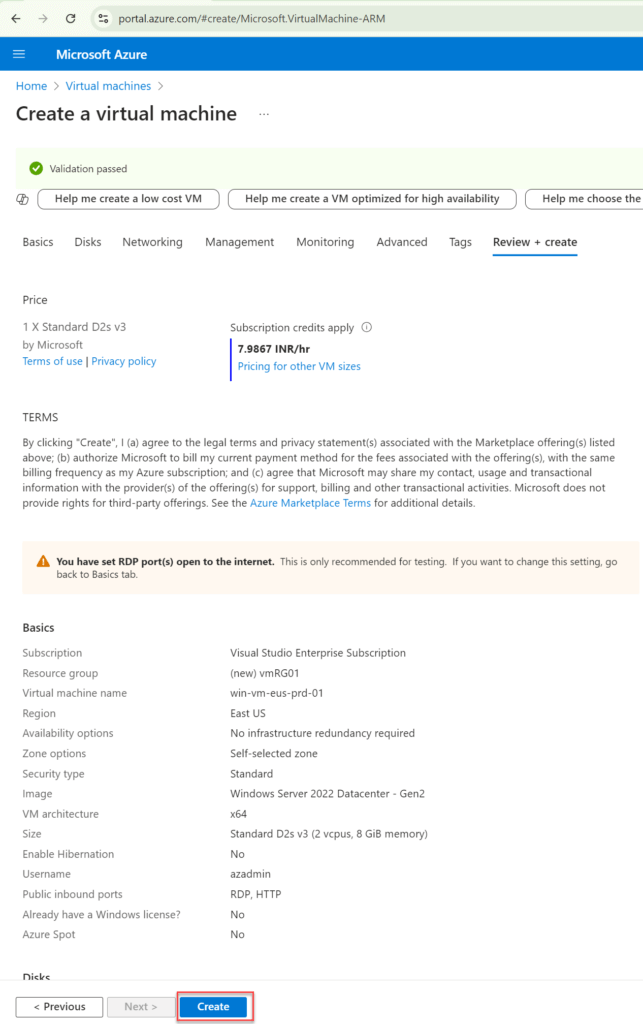
21. On the “Review + Create” tab. We’ll see a summary of all the parameters that are defined.
22. If Validation is passed then click on “Create” to create the Virtual Machine. If Validation is failed then review the mandatory parameters that are not defined or required.
23. Once the Azure Virtual Machine is successfully created, follow the fist 2 steps mentioned in this article, there you will see a newly created Virtual Machine.

Above mentioned steps will create Virtual Machine using Azure Portal. We’ll discuss other options to create Azure Virtual machines, Secure Virtual Machine, Access Virtual Machines, etc in the future articles.