How to deploy Virtual Machine using template in vCenter Server
How to Deploy Virtual Machine using Template in vCenter Server
In this post, we’ll learn the steps to deploy Virtual Machine using template in vCenter Server 6. In the old posts, we learned the steps to create VM Template and learn the steps to convert VM to template. Template can be used to deploy multiple Virtual Machines. We can install all the pre-requisites e.g. mandatory software and applications on the OS and then convert the Virtual Machine to template.
Steps to deploy Virtual Machine using template in vCenter Server 6
Step 1:
Login to vCenter Server 6 (steps to install vCenter Server)
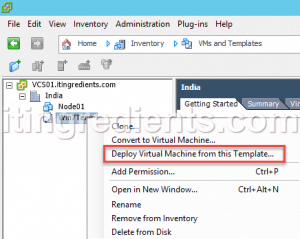
To open VMs and templates either click on Home and then click on VMs and templates or click on Inventory and then click on VMs and templates or press Ctrl+Shift+V to open VMs and templates.
Step 2:
Right click the template and select the option “Deploy Virtual Machine from this template”.
Step 3:
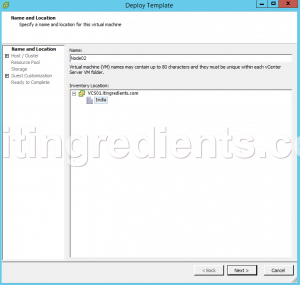
Define the name and location of new Virtual Machine that we want to create and select the Datacenter that would host this VM.
Step 4:
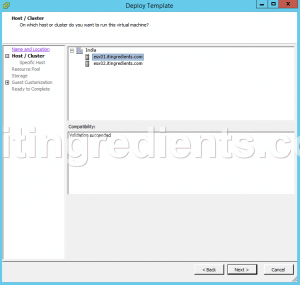
Select the host or cluster on which you want to Host this Virtual Machine. Selected ESXi Server that would host this newly created Virtual Machine.
Validation succeeded under compatibility would confirm that this machine is compatible and can be hosted on this server. You’ll not be able to continue in case of any error.
Click on next to continue.
Step 5:
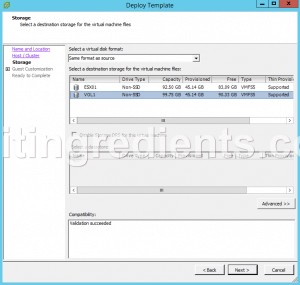
In the Storage console, we can see list of all the local and shared storage attached with this Server.
Select a virtual disk format and the destination Storage on which you want to create this Virtual Machine.
Step 6:
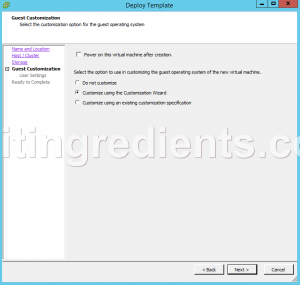
Guest Customization is an important step while creating new VM using template. It would help us in defining the IP, Name, Domain, etc for the newly created VM. We can see an option to “Do not customize”, “Customize using the Customization Wizard” and “Customize using an existing customization specification”.
As we don’t have any existing customization specification therefore select an option “Customize using customization wizard”.
Step 7:
To start with registration information of guest Operating System, type owner’s name and Organization Name.
Step 8:
Assign VM name, please ensure that name should not exceed 15 characters else it would be truncated.
Specify the Windows Licensing information i.e. Product Key and server license mode.
Define Administrator account password.
Define Time Zone.
Step 9:
Specify the command that would run when the user logs on for the first time.
Step 10:
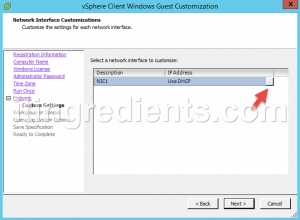
Define the Network setting, for this practical we’ll select “Custom settings”.
Click on the NIC1 interface to define the static IP Address.
Step 11:
Define the Server Domain Name and define the user account that has permission to add a computer to the domain. (steps to create Domain Controller)
Step 12:
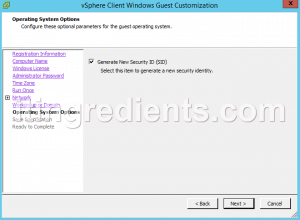
Select the option “Generate New Security ID(SID)”. It would generate new SID for the newly created Virtual Machine.
Assign the name to the customization specification for later use.
Click on next and then click finish twice to close the customization wizard and deploy Virtual Machine using template.
Step 13:
Entire process would take few minutes and would create new VM with the name of Node02. Follow the same process if you want multiple Virtual Machines to be created.
Hope you understood the steps to deploy Virtual Machine using template in vCenter server 6. Feel free to leave your comments and suggestions in the comment section.


