How to Access Azure Virtual Machine
How to Access Azure Virtual Machine
In this article, I will explain two options to access Azure Virtual Machines. Before we start with the process to access Azure Virtual Machine, follow the steps to create a Azure Virtual Machine.
Option 01
1. To access an Azure Virtual Machine, open browser and go to https://www.portal.azure.com. Login with your credentials.
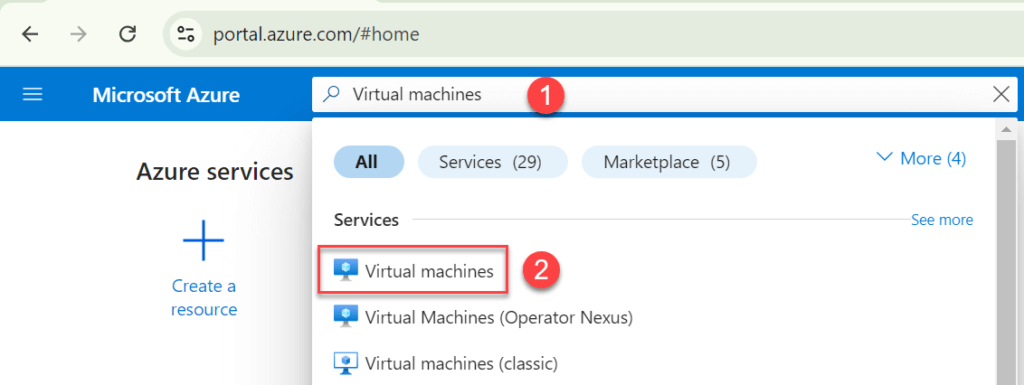
2. Go to the search tab and type “Virtual Machine” and click on “Virtual Machines”.
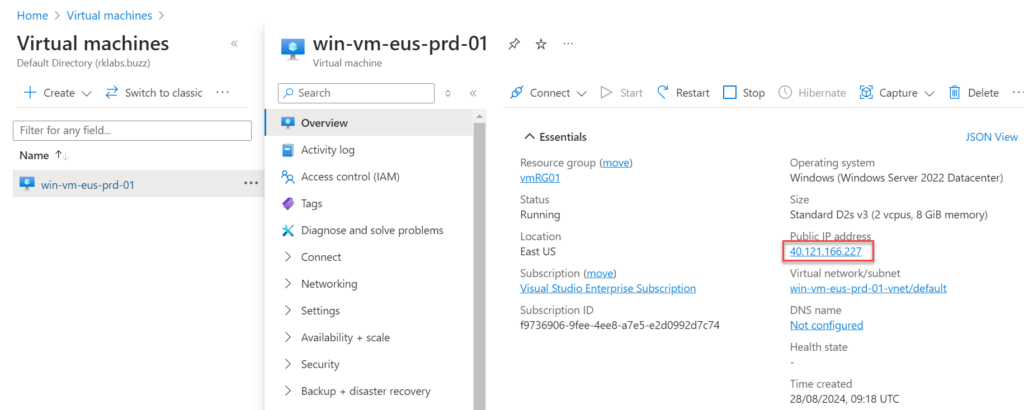
3. Click on the “Virtual Machine” name and copy the Public IP Address.
4. To access the Virtual Machine from your Laptop, right click on the start menu and click on run and type mstsc and click on ok.
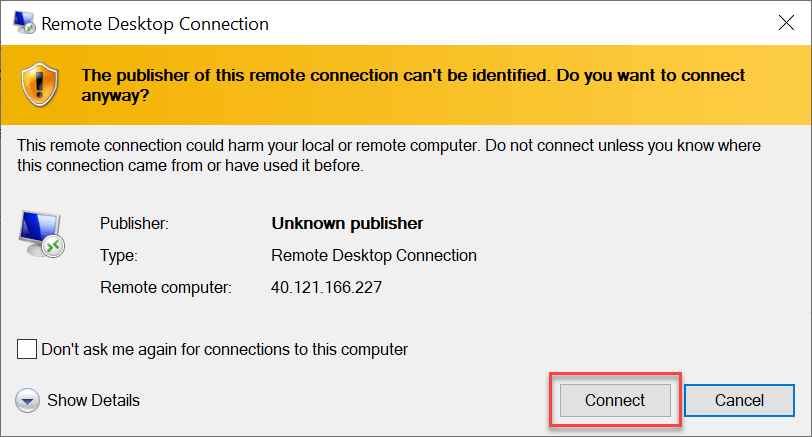
5. Type the public IP address copied and click on connect to access the Virtual Machine using the Public IP address.
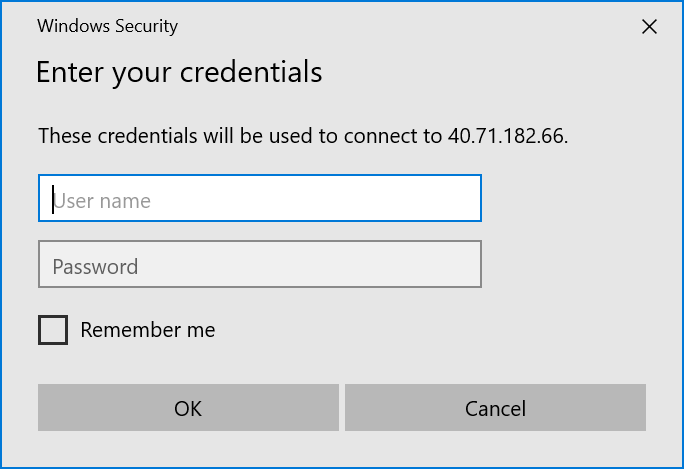
6. Type the User Name and the password to connect the Virtual machine.
Option 02
1. To access an Azure Virtual Machine, open browser and go to https://www.portal.azure.com. Login with your credentials.
2. Go to the search tab and type “Virtual Machine” and click on “Virtual Machines”.

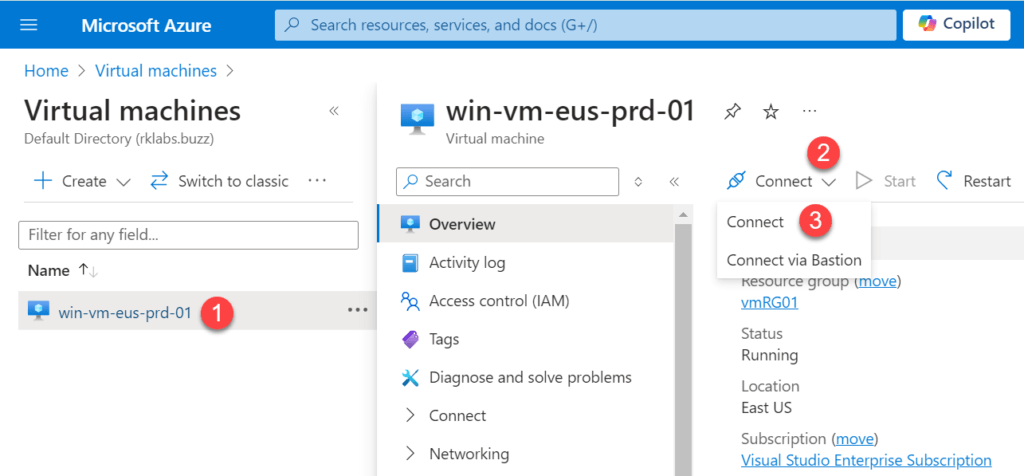
3. Click on the “Virtual Machine” name, click on Connect dropdown and then click on connect again.
4. Click on “Download RDP File“. Once the file is downloaded, double click on the file to open it.
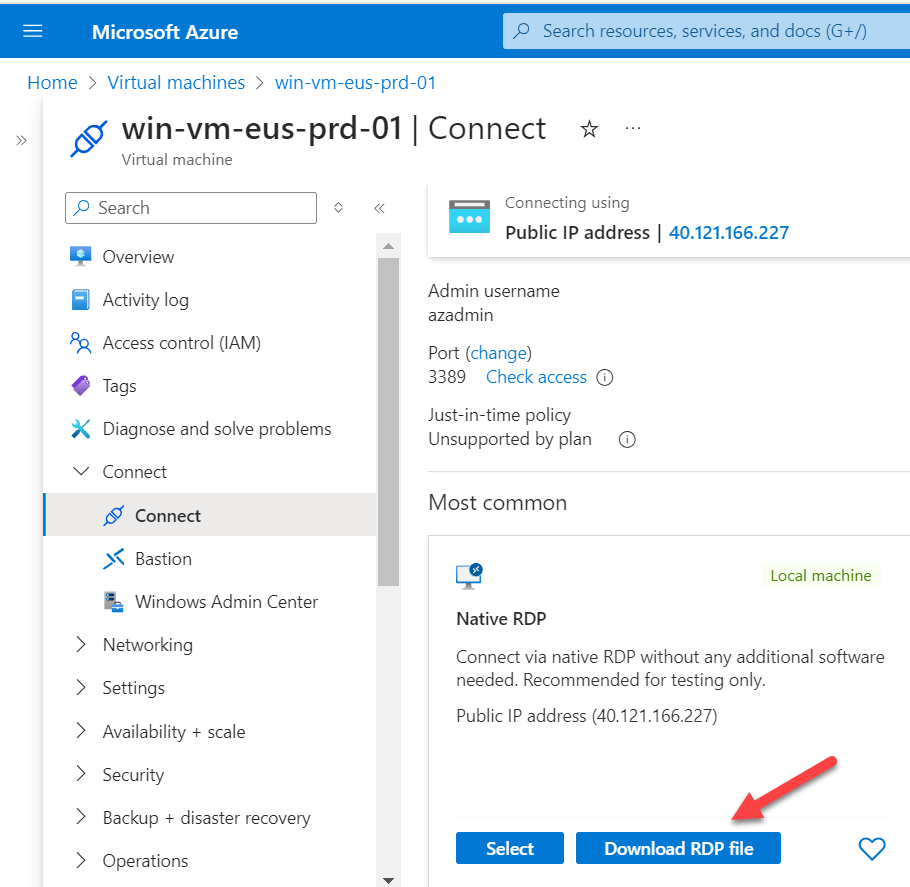
5. Once the file is open click on Connect and then type the admin password to login to the Azure Virtual Machine.
