

How to install VMWare Horizon View 7 Connection Server- Step 1
VMWare Horizon View 7 is used for Desktop Virtualization. It can be used to create Desktop Pools to offer Floating and Dedicated Desktops to end users. It delivers Virtual Desktops and Applications through a single console. New version of VMWare Horizon 7 is more stable because of Blast Extreme Protocol, Instant Clone, etc.
In the old posts, we have already learned the steps to configure Citrix XenDesktop. Citrix also offers Application and Desktop Virtualization.
Pre-requisites:
- Domain Controller
- VMWare ESXi 6 as Hypervisor
- Domain User with delegated permissions of Domain Administrator
- Download VMWare Horizon 7 View Connection Server.
- VMWare Horizon 7 License: You’ll get the License when you register and download VMWare Horizon 7
Topic Sequence
- How to install VMWare Horizon View 7 Connection Server
- How to install VMWare Horizon 7 Composer Server
- How to add vCenter Server and Composer Server in Connection Server.
- Steps to add VMWare Horizon Agent
- How to create Virtual Desktop Pool
Steps to install VMWare Horizon View 7 Connection Server
Step 1:
Download the executable of VMWare Horizon View 7 Connection Server and run the same.
Click on next to continue the installation.
Accept the agreement and click on next to continue.

Step 2:
Define the destination folder or continue with the default path and click on next to continue.
Step 3:
Select the type of VMWare Horizon View 7 connection server instance you want to install.
For this practical, we’ll select “Horizon 7 Standard Server”.
Type of Horizon 7 Connection servers
- Standard Server: Standard Server is a first instance if you are planning to create the group of Servers. It is used for the Management of Horizon 7 Virtual Desktops and Applications. It is the single point of management to define the User enrollment and permissions.
- Replica Server: It acts like a replica of the Standard Server. It is primarily used to provide redundancy and high availability. It is required if Standard Server is not available. It shares common database.
- Security Server: It is primarily deployed in DMZ zone. It provides secure environment for external users to access their Virtual Desktops and Applications. It is required to be connected to either Standard or Replica Server.
- Enrollment Server: It is used for True SSO i.e. Single Sign On.
Select the IP Protocol version you want to use to configure VMWare Horizon 7 Connection Server. For this practical we’ll select IPv4. Click on next to continue.

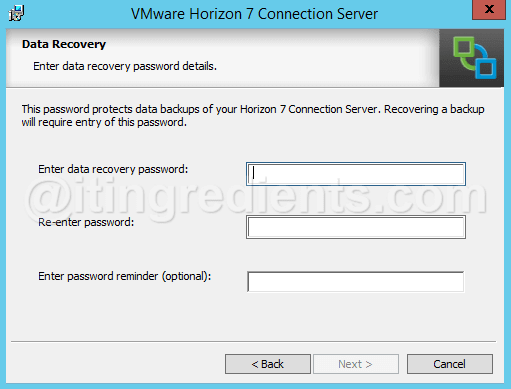
Step 4:
Specify the data recovery password. It is required to recover the backup.
Once specified, click on next to continue.
Step 5:
While configuring VMWare Horizon View 7 some of the incoming TCP ports are required to be allowed. Select the option “Configure Windows Firewall Automatically” and it would allow all the required ports in the Firewall (Steps to disable Windows Firewall) or select an option “Do not Configure Windows Firewall” if you want to configure Firewall manually.

Step 6:
You need to be authorized and have local Administrators access on the Server on which you are installing VMWare Horizon 7 Connection Server.
For this practical, we have delegated Domain Administrator rights to Domain User TU1. Please ensure that you have proper permissions defined before starting the installation process. The authorized user would be acted as an Horizon View Administrator.

Step 7:
To participate in the user experience improvement program check the box and give the required details. For this practical, we’ll skip the same and click on next to continue.
Step 8:
Click on Install to begin the installation of VMWare Horizon 7 Installation.
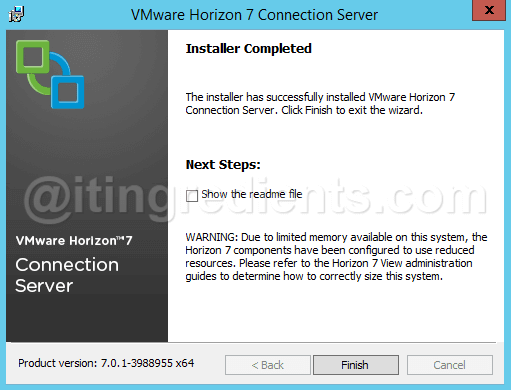
Once the installation is finished, click on Finish to close the console.
Step 9:
Once the installation is successfully completed, an icon of VMWare Horizon 7 would be created on the Desktop. Double click on the icon to start the administration and management of Horizon View. To configure the VMWare Horizon 7 license, expand the view configuration and select “Product Licensing and Usage” and then click on “Edit License”.
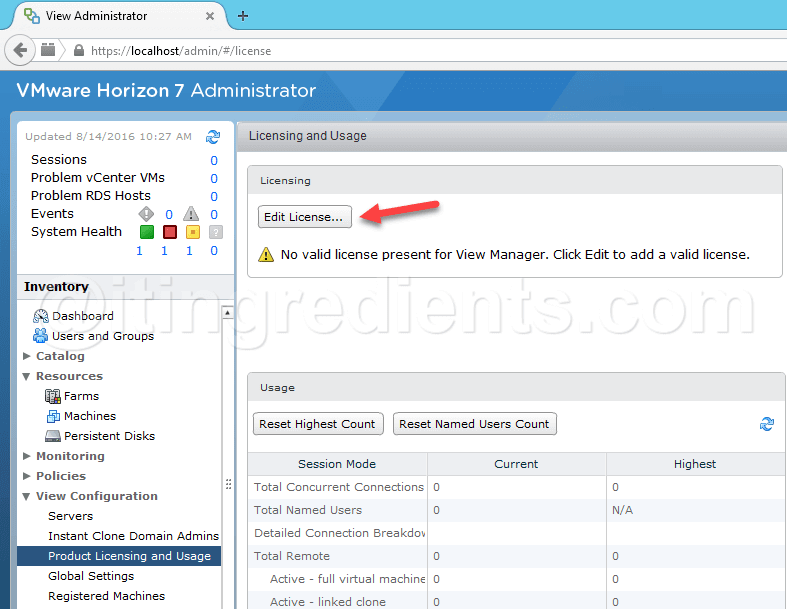
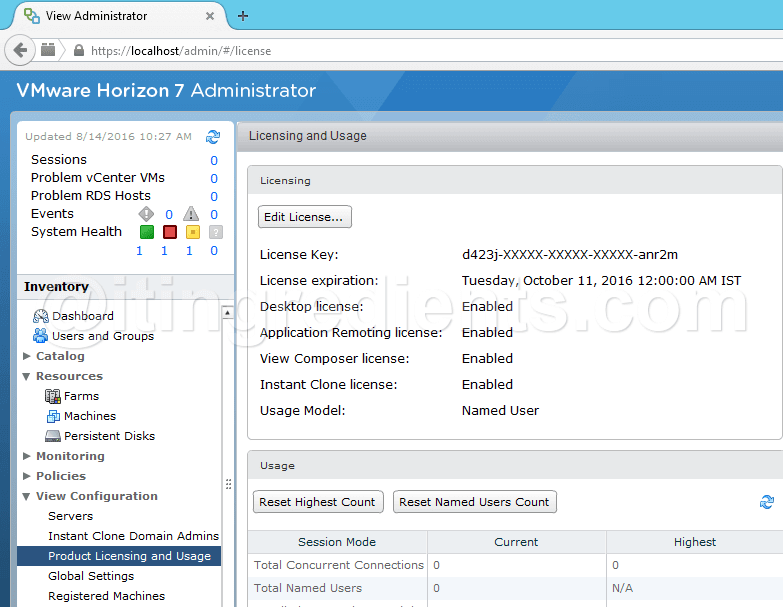
Step 10:
Specify the License key and click on OK to configure Licensing. Once the Horizon View License is configure successfully, it would show License expiration date and the features that are enabled.
Step 11:
Click on Dashboard to check the health of all the View Components that you have installed. It would turn them in Red color in case of any issues.

This concludes this tutorial. Hope you understood the steps to install VMWare Horizon View 7 Connection Server on Windows Server 2012 R2. Please feel free to leave your comments and suggestions in the comments. Please don’t forget to like and share this article with your friends and colleagues. Happy Learning… !!
What’s the use of VMWare Horizon View 7 connection server? Type the answer in the comment as per your understanding.