VMware Scheduled Task to Power-Off and Power-On Virtual Machine
Do you scheduled task or prefers to perform all the tasks manually. Scheduling tasks gives you a liberty to automatically run the task even if you are not physically available to perform the tasks.
In this article, we’ll learn the steps to scheduled task to Power-Off and Power-On Virtual Machines. Think about a scenario in which you have a weekly maintenance scheduled but because of some other urgent work you are not available during that duration. In that case it would be good to schedule a task to power-off Virtual Machines when maintenance starts and then later Power-On Virtual Machines when maintenance is over.
Scheduled Task in VMware vCenter Server
Step 1:
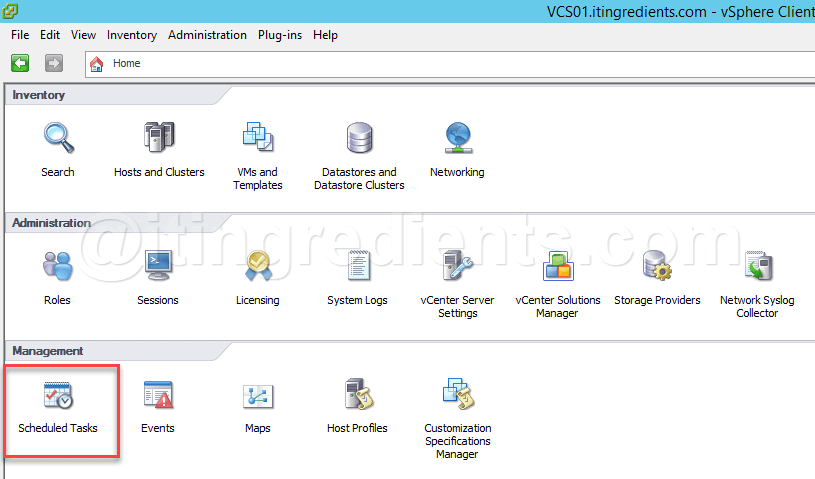
Login to vCenter Server and then click on Home.
Click on Scheduled Task under Management.
Step 2:
Click on New option to create new task.
Step 3:
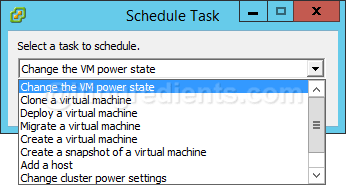
Schedule Task window would open, it gives you multiple options to Schedule e.g. Change the VM Power State, Clone a Virtual Machine, Deploy a VM, Migrate, Create, etc.
You can select the task that you want to perform as per your requirement.
For this practical, we’ll select the first option i.e. “Change the VM Power State“.
Step 4:
Select the Virtual Machine whose state you want to change.
For this practical, let’s select VM names as Node01 and click on Next. (Steps to change Server Name)
Step 5:
Select the Power operation e.g. Power on, Power off, shut down, suspend or reset. For this practical, we’ll select the option “Power-On”
Click on next to continue.
Step 6:
Specify Task Name and description.
Define the frequency, you can schedule this task either once, After start-up, hourly, daily, weekly or monthly.
Specify the time and date when you want to schedule task to Power-Off Virtual Machine.
Step 7:
To configure notification you can check the option “send email to the following addresses when the task is complete” and specify email address of an individual or group.
Step 8:
On the summary window, review the summary and click on Finish to schedule task to Power-On VM. You’ll see the task once it is created.
Scheduled Task in VMware Web Client to Power-Off VM
Step 1:
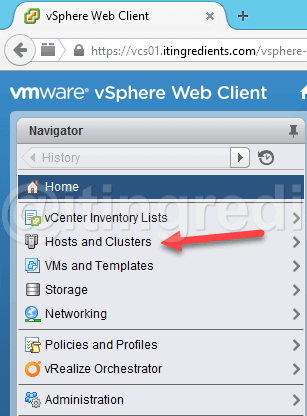
Login to VMware vSphere Web Client.
Click on “Hosts and Clusters”
Step 2:
Select the VM for which you want to Schedule task to Power-Off. For this practical, we’ll select Node01.
Click on Manage tab.
Click on “Scheduled Tasks”
Click on “Schedule a New Task”
Select the task that you want to Schedule. For this practical, we’ll select “Power-Off”
Step 3:
To supply scheduling information, click on OK.
Step 4:
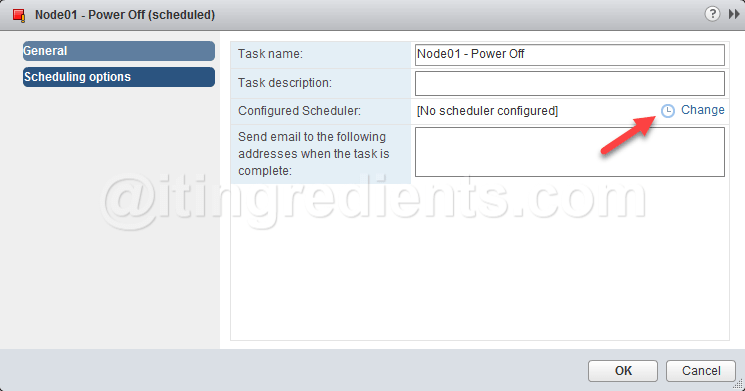
Specify Task Name and description.
Click on Change to define the scheduled time.
Click on OK once done.
Step 5:
Once the tasks are created, we can see list of all the scheduled tasks, their Name and their schedule.
This concludes the tutorial. Hope you enjoyed this article. Please feel free to leave your comments and suggestions in the comment section. Moreover please don’t forget to like and share this article with your friends and colleagues. Happy Learning…!!
Can we schedule a task for ESXi Servers using VMWare Scheduled Tasks or not. Reply in the comment section..!!


