

How to Create Desktop Pool in VMware View – Step 5
How to create desktop pool in VMware View
In this post, we’ll learn the steps to create Desktop Pool in VMWare View. In the old post, we already discussed the steps to install VMWare Horizon 7 Connection Server, steps to install VMWare View Composer, added vCenter Server and Composer Server in Connection Server, installed VMWare View Agent.
Topic Sequence
- How to install VMWare Horizon View 7 Connection Server
- How to install VMWare Horizon 7 Composer Server
- How to add vCenter Server and Composer Server in Connection Server.
- Steps to add VMWare Horizon Agent
- How to create Virtual Desktop Pool
Desktop Pool defines the total number of Virtual Machines that are required. It is totally dependent on the total number and kind of users that we have in our Environment.
We can define Dedicated VMs or Floating VMs as per our requirements. We’ll discuss that in detail in this article.
Steps to Create Desktop Pool in VMWare View
Step 1#
Open VMWare Horizon View Console and then click on Desktop Pools and then click on Add to add new Desktop Pool.

Step 2#
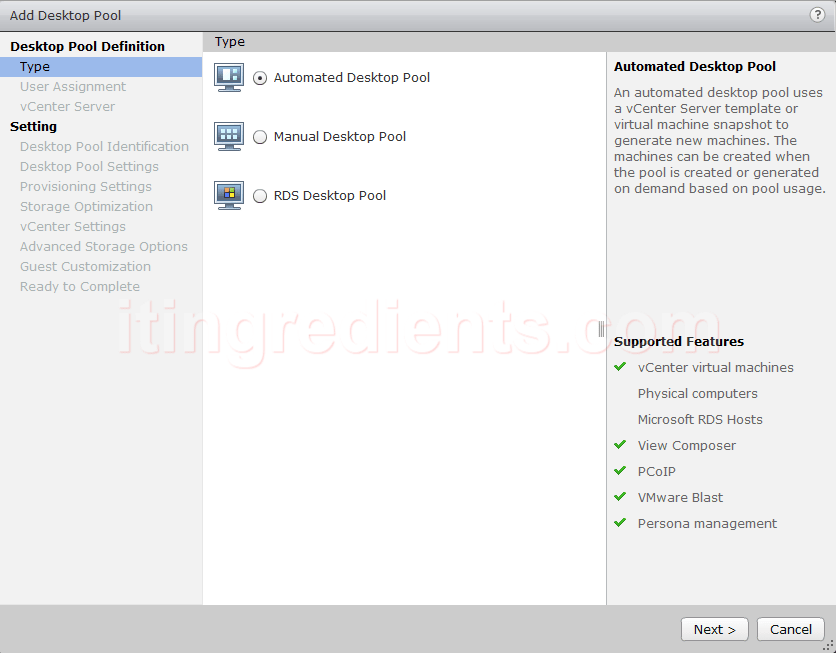
We’ll see three types of “Desktop Pool” i.e. Automated Desktop Pool, Manual Desktop Pool and RDS Desktop Pool.
Steps to install and configure vCenter Server
Automated Desktop Pool: It used vCenter Server template or Virtual Machine snapshot to generate new VMs. Virtual Machine template or Snapshot is required for Automated Desktop Pool
Manual Desktop Pool: It supports any kind of vCenter Server Virtual Machine or Physical Machines on which agent is deployed.
RDS Desktop Pool: It is used to provide RDS sessions of Virtual Machines or Physical Machines. It’s kind of taking remote of your Desktop.
For this article, we’ll select an option “Automated Desktop Pool” and click on next to continue.
Step 3#
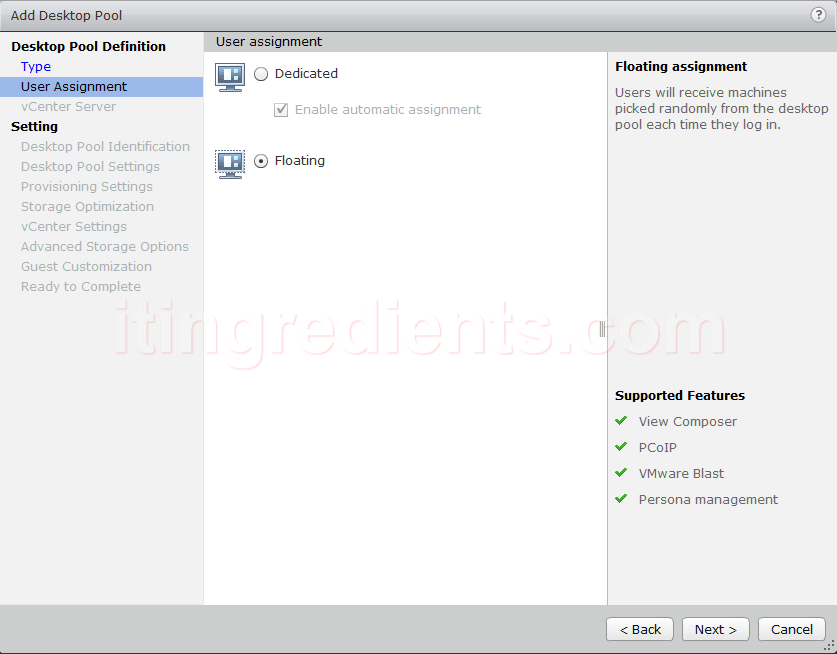
We’ll see two options for “User Assignment” i.e. Dedicated or Floating.
Dedicated: It’s more like an Assigned VMs, i.e. One O One mapping of Virtual Machines and Users. Every time user logs in they get similar Virtual Machine and all their data remains persistent.
Floating: It’s a pool of VMs. It is more prominent in environments where Dedicated Virtual Machines are not required. VMs are assigned on first come first serve basis. Once the user logs Off from the Desktop then it is available for another User.
For this practical, we’ll select Floating and then click on next to continue.
Step 4#
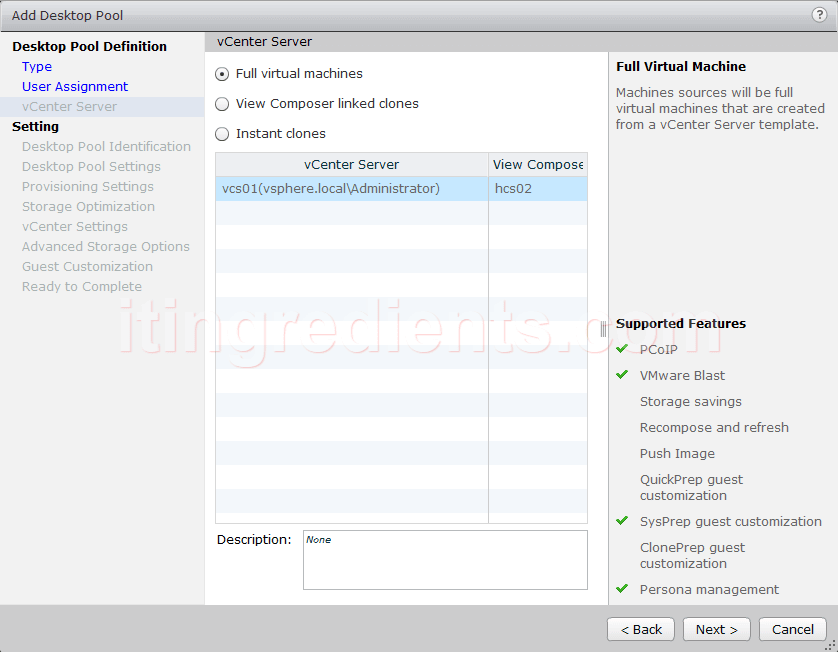
Now we need to define the type of Virtual Machine that we are going to create. We’ll see an option of Full Virtual Machines, View Composer linked clones and Instant Clone.
Full Virtual Machines: A full VM is created through the VM template created in the vCenter Server. You can install all the required applications and software before we convert or create a VM template.
View Composer Linked Clones: As the name states, linked clones share the same base image. Pre-requisite that we should have Composer and vCenter Servers added to Connection Server.
Instant Clones: Instant Clones also share the same base image and they use less storage space. They always stay power-on and get recreated from current published image after logoff.
For this practical, we’ll select Full Virtual Machines and then click on next to continue.
Step 5#
On the “Desktop Pool Identification” window, define the unique ID and Display name and then click on next to continue.
Step 6#
On the “Desktop Pool Settings”, change the settings as per your requirement. For this practical, we’ll go with the default settings.

Step 7#
On the Provisioning settings, use the option “Use a naming pattern” to define the naming pattern. For this example, we’ll define the naming pattern as Win10-{n}. In this example, n would automatically replaced by the number.
And select the option “Provision all machines up-front”. Also define the total number of Virtual Machines that you want to create.
As we want 3 VMs to be created therefore we have defined 3.

Step 8#
For the Storage policy, we’ll select an option “Do not use VMWare Virtual SAN”. As we don’t have Virtual SAN configured on our vCenter Sever.
Step 9#
On the vCenter Settings window. To create Desktop Pool, select the VM Template that you would like to use to create multiple Virtual machines. Also select, VM Folder, Host or Cluster on which VM would be hosted, Resource Pool if you have created any and Datastores in which these newly created VMs would be hosted.

Step 10#
On the Advanced Storage Options, let’s go with the default options and click on next to continue.
Step 11#
Select the option “Use this customization specification” and click on next to continue.
Step 12#
Review all the settings that we have selected and click on Finish if no changes are required.
Step 13#
Under Catalog, in Desktop Pool we can see ID1 is created successfully. Double click on ID1 and click on Inventory tab to see all newly created Automated Virtual Machines.

Hope you understood all the steps that we have mentioned to create Desktop Pool. Please feel free to leave your comments and suggestions in the comment section. And don’t forget to share this with your friends and colleagues.
What are the pre-requisites required to create Desktop Pool in VMware view? Answer the same in the comment section.