How to install SQL Server 2012 on Windows Server 2012 R2
Microsoft SQL Server is the best database that almost all the Organizations are using to create databases. It is the most recommended and trusted database for all the critical applications. In this article, we’ll learn the steps to install Microsoft SQL Server 2012 on Windows Server 2012 R2. I am not an expert in SQL Server therefore we’ll talk about the simple steps to install Microsoft SQL Server 2012, moreover I’ve installed all the features even if we are not using all of them.
You can refer to this article, if you are planning to deploy Citrix XenApp, Citrix XenDesktop, VMWare vCenter Server, VMWare Horizon View 7, etc.
Steps to Install SQL Server 2012 on Windows Server 2012 R2
Step 1:
Download SQL Server executable and then copy it to the server on which you want to create the Database.
Run an executable to start the installation of SQL Server 2012.
Step 2:
On the SQL Server Installation Center, click on Installation and then click on “New SQL Server stand-alone installation or add features to an existing installation“.
Step 3:
On the Setup support rules window, click on Ok.
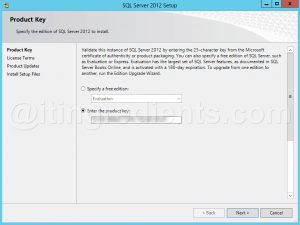
On the Product Key window, specify the SQL Server License key and then click on next to continue.
Step 4:
Accept the license term and then click on next.
Product update window would recommend you to keep your Server updated with the latest updates and patches. If you are not connected to internet then you might see an error message. You can ignore the same and click on next to continue.
On the Setup Support Rule, please ensure that all the test passed. You can safely ignore the warning but not the errors. If you see any errors then fix the same.
Step 5:
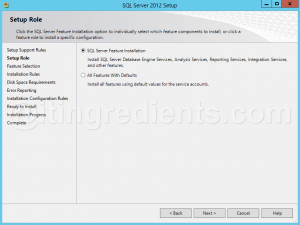
On the setup role window, select an option “SQL Server feature Installation“.
Click on next to continue.
Step 6:
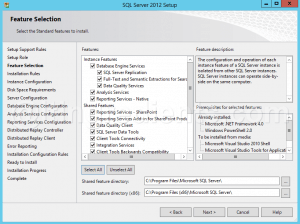
Select list of features that you are planning to use. For this practical we selected all the features.
Click on next twice to continue.
Step 7:
On the “Instance Configuration” window, we’ll select the default instance and continue.
Click on next again.
Step 8:
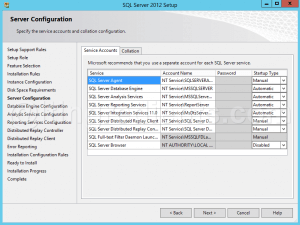
On the Server Configuration window click on next.
Step 9:
On the Database Engine Configuration window, we’ll select an option of Mixed mode. This allows us to use dual authentication mechanism i.e. Windows Authentication Mode and SQL Server System Administrator (SA) account. (Steps to create Domain User)
Specify the password for SA (SQL Administrator) account.
Click on Add Current User if you want to authorize current user as SQL Administrator else you can click on Add and select another user.
Step 10:
On the “Analysis Services Configuration” click on “Add Current User” to add Analysis Services Administrator.
Step 11:
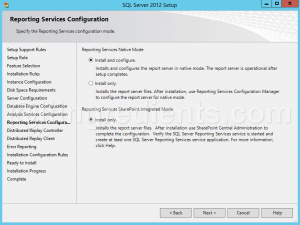
If you are planning to user Reporting Services then select an option “Install and Configure”.
Step 12:
Click on “Add Current User” to add Display Replay Controller Administrator.
Step 13:
Specify Controller Name and their working directories else click on next thrice to accept the default settings.
Step 14:
On the “Ready to install” window, review all the settings that you have defined and click on Install to install SQL Server 2012. Once installation is completed, click on Finish.
This concludes this tutorial. Hope you enjoyed the steps to install SQL Server 2012 on Windows Server 2012 R2. Please feel free to leave your comments and suggestions in the comment section and don’t forget to like and share this article with your friends. Happy learning…!!
What’s the version of .Net Framework would be installed as the Pre-requiste of SQL Server 2012, type the answer in the comments.







Today is my first day to know this blog but I really appreciate it and I’ll keep on using it for knowing many things in IT. My appreciation to whoever did this great job.