How to Load Balance an application in Citrix Xenapp 6.5
How to Load Balance an Application in Citrix XenApp 6.5
In the old posts, we already learned the steps to install Citrix XenApp 6.5 and learned the steps to publish application on Citrix XenApp 6.5. In this post, we’ll learn the steps to load balance an application.
To load balance an application, it is must that application is available/ installed on more than one servers, only then it can be load balanced. In this post, we’ll show the steps to load balance Calculator application. You can load balance any application using the steps given below.
We are assuming an environment, in which we have two Citrix Serves i.e. CTX01 and CTX02. Calculator is a pre-installed application available on both the Servers.
Steps to Load Balance an Application in Citrix XenApp 6.5
1. To load balance an application in Citrix XenApp 6.5, open Citrix AppCenter, expand Citrix Resources, XenApp, CitrixFarm (Farm Name), right click on “Applications” and select Publish application.
2. Click on next to continue.
3. Type the display name of an application. Calc is the name that we want to be displayed to end users. Click on next to continue.
4. Select “Application” and then select “Access from a server”. This would allow end users to access an application from the server.
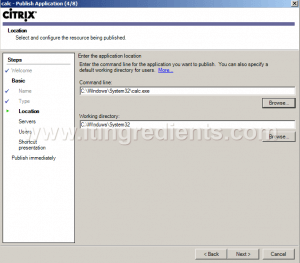
5. In “select and configure the resource being published” window, we need to define the path where application’s executable is. Click on Browse.
6. By default Calculator’s executable is in C:\Windows\System32 directory. Select “Calc” and click on open.
7. Please confirm that the path of an executable is correct. In this practical, patch of calculator is “C:\Windows\System32\Calc.exe”. Click on next to continue.
8. Please take a note, this is very important step to load balance an application on Citrix XenApp 6.5. In Servers window, click on Add to select the list of servers on which application is installed.
9. Only select the servers on which application is available. In this scenario, Calculator is pre-installed on both the servers. If you have load balancing any other application then please ensure that while installing the application path of executable should be the same on all the servers. Select the servers and click on “Add”. Click on Ok.
10. In this window, please ensure you have all the servers listed on which application is installed. If you have added any other server then select the server and click on remove to remove it from the list. Click on next to continue.
11. In this step we’ll grant the access to the users. Select “Allow only configured users” and then click on “Add”.
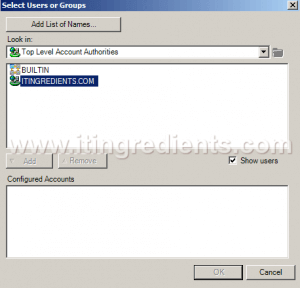
12. For domain users, select the name of domain. In this example, itingredients.com is the name of our domain.
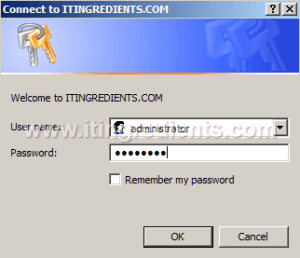
13. Define the credentials to lookup the list of Domain Users and Domain Groups.
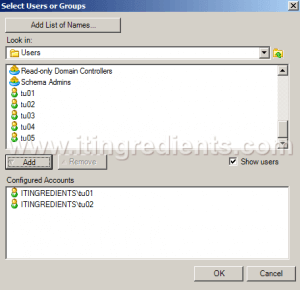
14. Select users and Groups window will only show the Groups, select “Show users” check box to see the list of users. Select the Group or User to whom you wanted to grant the access of an application. For this practial, we have selected users TU01 and TU02 but I’d recommend to create a group, add users in group and then grant access to group instead of granting access to individual users. Click on OK.
15. Confirm that users are successfully added. Click Next.
16. Application can be changed by clicking on “Change Icon”. Click next.
17. Click finish. This finishes the steps to load balance an application in Citrix XenApp 6.5.
18. To verify if the application is load balanced or not. Right click on the published application and then click on “Application Properties”.
19. In the “Application Properties” window, select “Servers”. Over here, we can see list of all the servers that we have selected. If any changes are required in future i.e. addition of new server or removing an existing server then it can be done from this console.


