How to fix Trust Relationship issue between Workstation and Domain
How to fix Trust Relationship issue between Workstation and Domain
In this post, we’ll learn the steps to fix Trust Relationship issue between Workstation and Domain. You must have seen an error “The trust relationship between this workstation and the primary domain failed” appear because of the password mismatch while logging to either member Servers or Client machines. Each computer account in Active Directory Users and Computers has an internal password, which automatically gets changed after every 30 days. One copy of this internal password is saved on the Domain Controller and another copy on the workstation.
Whenever, the copy of internal password saved on the workstation mismatches with the copy of password saved on the Domain Controller, the trust relationship will break and this error appears. This error can be fixed only when the trust relationship between the workstation and the Domain Controller established again.
Steps to fix Trust Relationship issue between Workstation and Domain
1. To fix Trust Relationship issue, log into the workstation on which you are facing this issue by using the credentials of a local administrator.
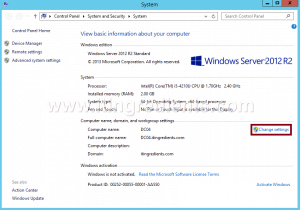
2. Right click on the Start menu button and then click on System. It will open the System console.
3. On the System console, click on “Change Settings“.
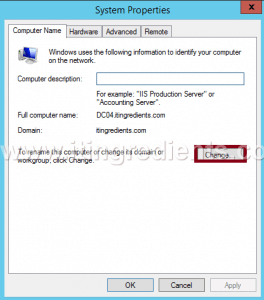
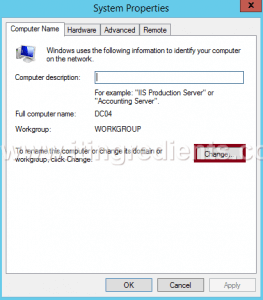
4. To fix Trust Relationship issue, on the System properties console, click Change to modify settings like rename computer and change computer’s domain or workgroup.
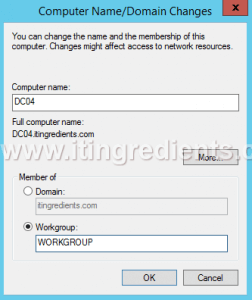
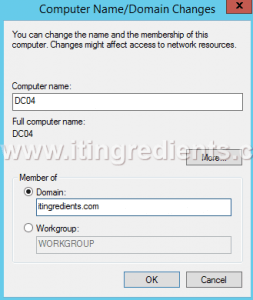
5. On Computer Name/Domain Changes console, under the setting of Member of select the option of Workgroup and enter the name of your workgroup. Click on Ok. In this practical, we have entered “WORKGROUP” as our workgroup name, however you can define any name.
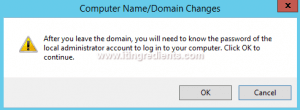
6. A dialog box appears regarding some information. It shows that after you leave the domain, you will need to know the password of the local administrator to log in to your computer. Please ensure you credentials of Local Admin. This step would dis-join your computer from Domain and add the same in Workgroup. Click on OK to continue.
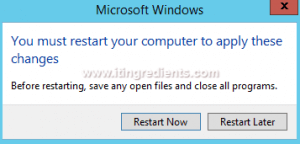
7. When our computer joins the workgroup then a dialog box appears regarding the restart of the computer. A restart is required by the computer to apply the changes. Click on Restart Now.
8. Now log into your computer using the credentials of a local administrator.
9. Right click on the Start button and then click on System to open the system console.
10. On the System console, click on “Change Settings“.
11. On System Properties console, click on the button of Change to change various settings like rename computer, change domain or workgroup.
12. To fix Trust Relationship issue, on Computer Name/Domain Changes console, under the setting of Member of select the option of Domain. Enter the domain name. In this practical, the name of our domain name is “itingredients.com“. Click on OK.
How to promote a Domain Controller
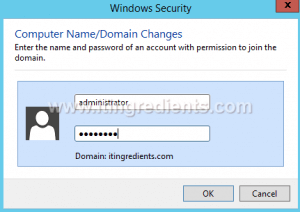
13. On Windows Security console, enter the name and password of an account with the permission to join the domain. In this practical, we have entered the credentials of the administrator of our domain itingredients.com. Click on OK to continue.
14. When our computer joins the domain, it needs to be restarted for applying changes. After the restart log into the computer using the domain credential. Here, we are using the credentials of the domain administrator. This time, no error appears which means we have successfully fixed the error of trust relationship.
Hope you understood the steps to fix Trust Relationship issue between Workstation and Domain. We do have an alternate command to fix the error “The trust relationship between this workstation and the primary domain failed“, we’ll discuss the same in future articles.
Please feel free to leave your comments and suggestions in the comments section.


