

How to Configure Citrix XenApp Server 6.5- Step by Step guide
How to Configure Citrix XenApp Server 6.5- Step by Step guide
We have already learned the steps to install Citrix XenApp 6.5 on Windows Server 2008 R2. After you are done with the installation steps, next step is to configure individual roles. In this article we’ll learn the steps to configure Citrix XenApp 6.5 on 2008 R2 for application virtualization. We’ll follow step by step approach to configure all the roles for application virtualization.
Configure License Server for Application Virtualization
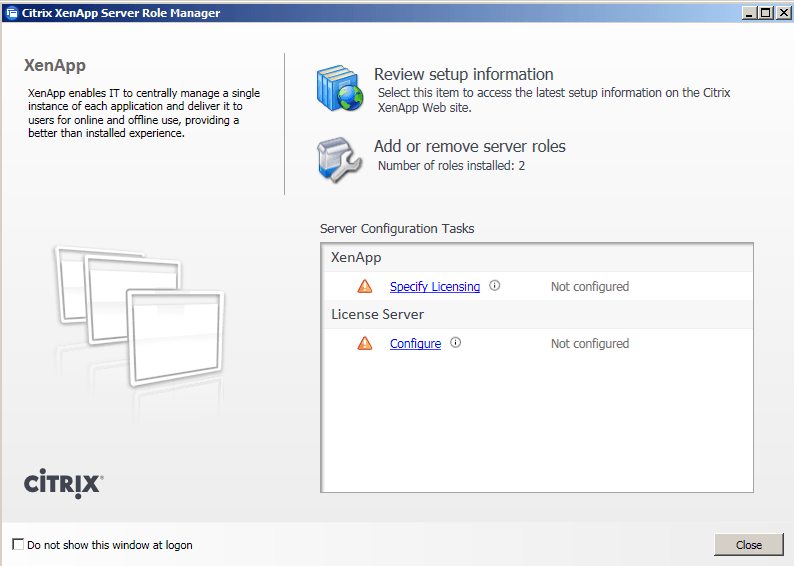
1. Very first step to configure Citrix XenApp 6.5 is to specify Licensing server. After Citrix XenApp 6.5 is installed, open “Role Manager” and select “Specify Licensing”.
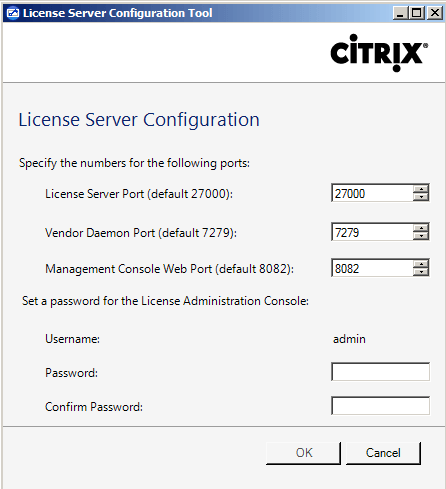
2. In “Configuration Tool” license port, vendor daemon port, management console web port are already configured. In case these ports are already used or you want to use alternate ports then change them. By default “Admin” is the administrator for licensing. Define the password for admin.
Specify Licensing for Application Virtualization
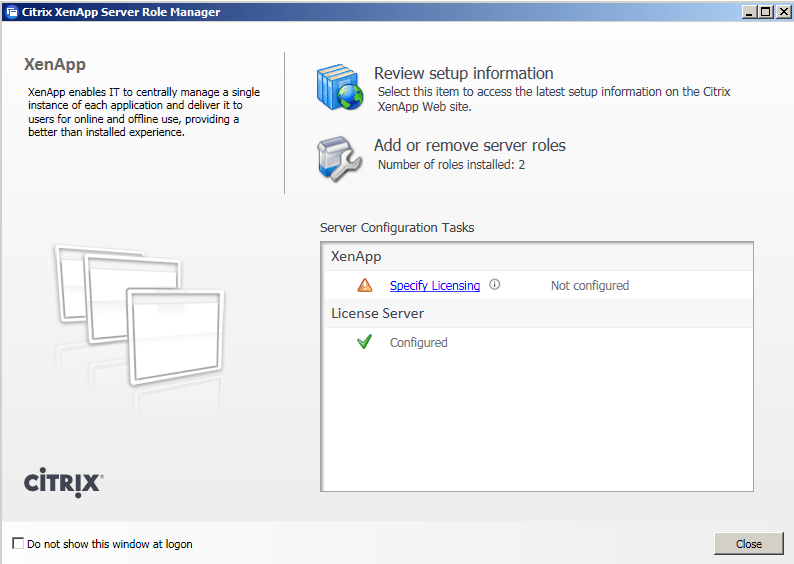
3. Once the licensing is configured successfully. Next step to configure Citrix XenApp is to specify details of license server. Select specify licensing.
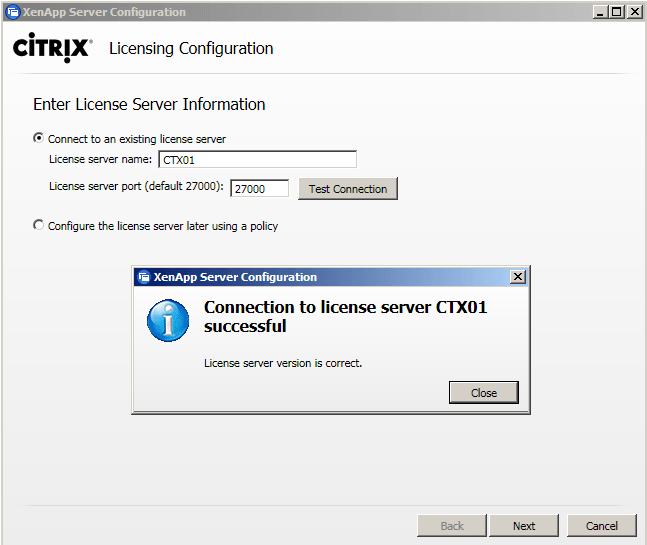
5. Type the name of License server name. In this case License role is deployed on CTX01 and default license port is 27000. However, if you have deployed licenses on different box then specify it’s name here.
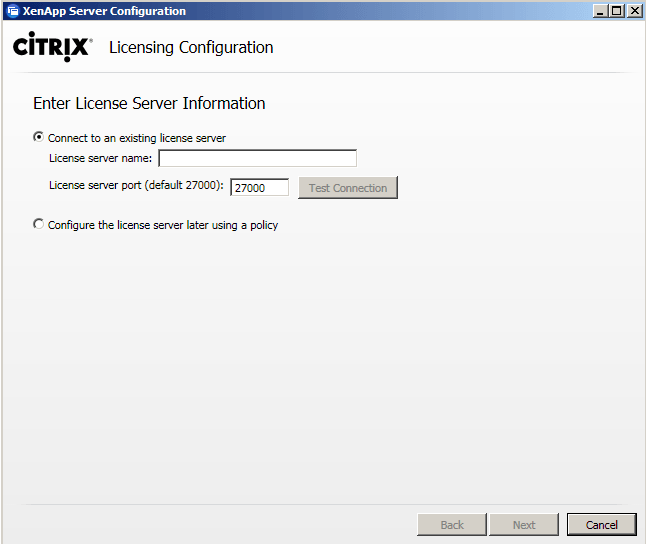
6. Select test connection to verify if connectivity with license server is successful or not. In case of test fails, check the connectivity and firewall settings.
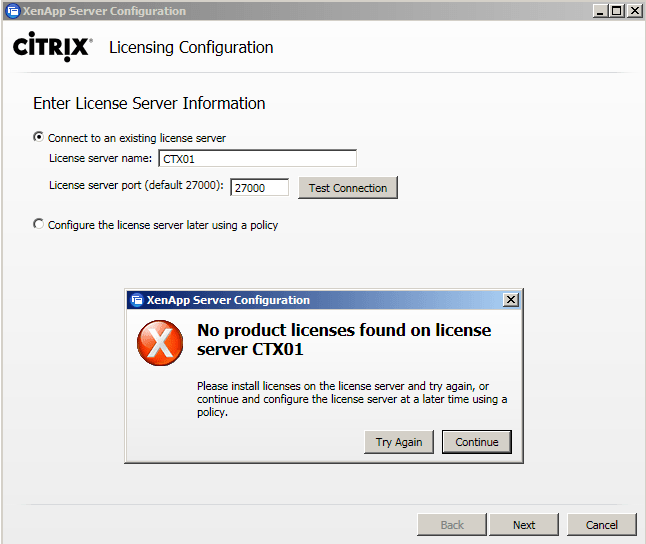
7. Click on next and it would show an error “No product licenses found”, this is because we don’t have licenses deployed on this box. We can ignore this message and click on continue.
8. To configure Citrix XenApp, select the licensing model as “XenApp”. Select XenDestop if you are using XenDesktop licenses. Citrix XenApp use concurrent licensing model i.e. total number of users accessing a virtual application at a single point of time.

Configure XenApp for Application Virtualization
9. To configure Citrix XenApp 6.5, select “Configure” in the “Citrix XenApp Server Role Manger”.

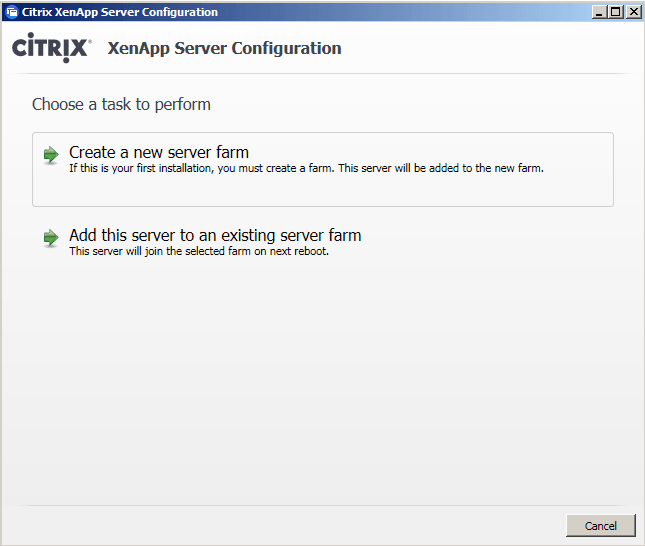
10. To configure Citrix XenApp, select an option to “Create a new server farm”. Citrix farm is a collection of Citrix servers.
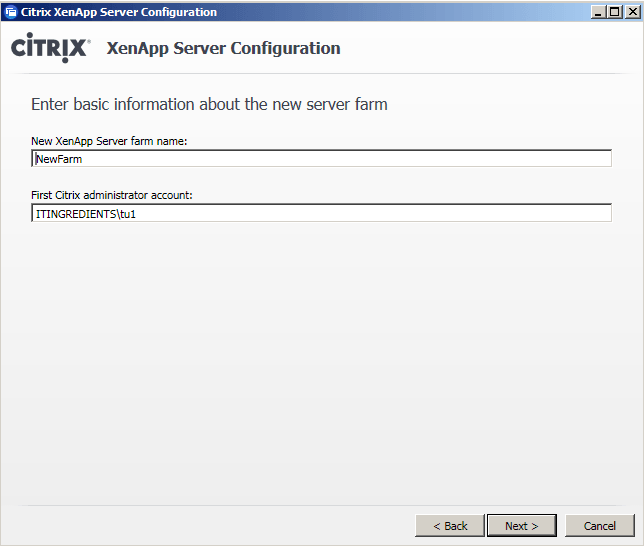
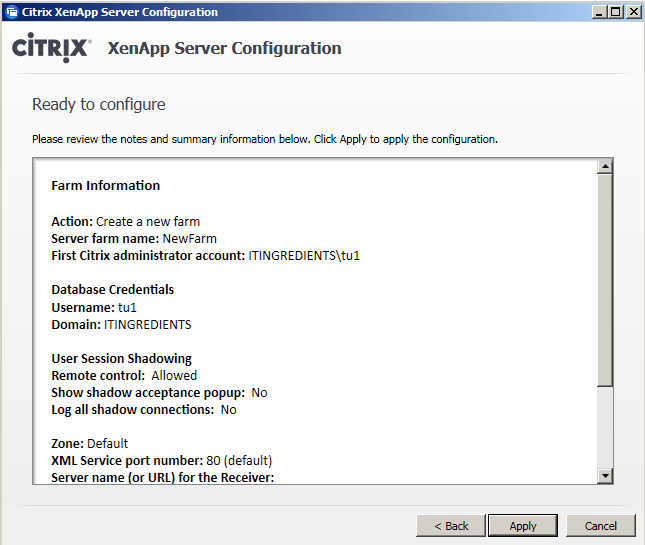
11. To configure Citrix XenApp, type the name of Citrix farm and define the farm administrator. For this practical we’ll define farm name as NewFarm. Domain user TU1 is specified as farm administrator.
12. All the information of the farm will be stored in a database. For this practical, we’ll install database role on the same machine. As we don’t have any existing database, therefore select an option of new database.

13. Type the credential of user, this account will be used as a database administrator.

14. Click on next to continue.
15. Allowing shadow will allow users to shadow other user sessions. If you prohibit shadow then it cannot be allowed after configuration therefore I’ll suggest to allow shadowing even if you don’t want to use it.

16. In data collection tab, zone name can be defined. Zone is like locations, we’ll talk about this in detail in future articles.

17. In “specify advanced settings”, XML port is defined as 80. This is because during installation, we selected an option to integrate XML service with IIS.

18. In receiver tab, we can specify the URL of Web Interface but we are not doing it right now.

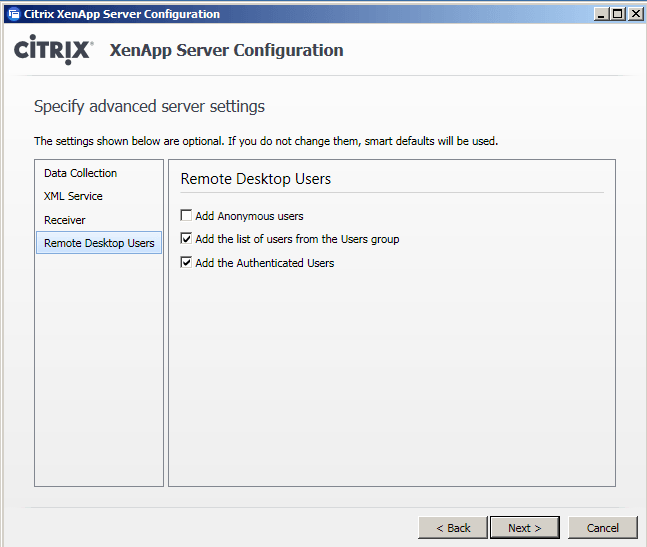
19. In “Remote Desktop Users” tab, select “Add the list of users from the users groups” and “Add the Authenticated Users”. Click on Next.
20. Click on apply to begin the configuration of Citrix XenApp 6.5 for application virtualization.
21. Configuration will install Microsoft SQL express and create data store. This data store will contain all the static information of Citrix Farm.
22. Click on finish after the configuration is successful.
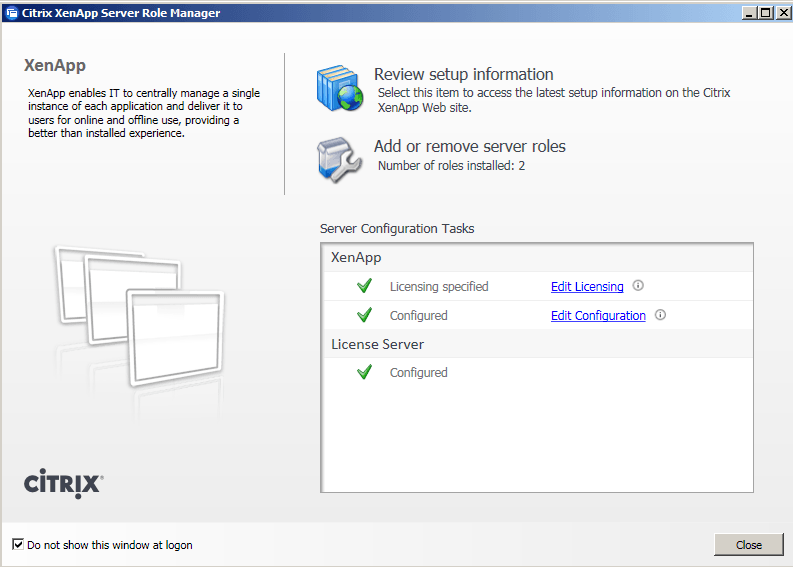
23. In role manager window, we can see green check specified for “Configured”. This confirms that configuration completed successfully for application virtualization.
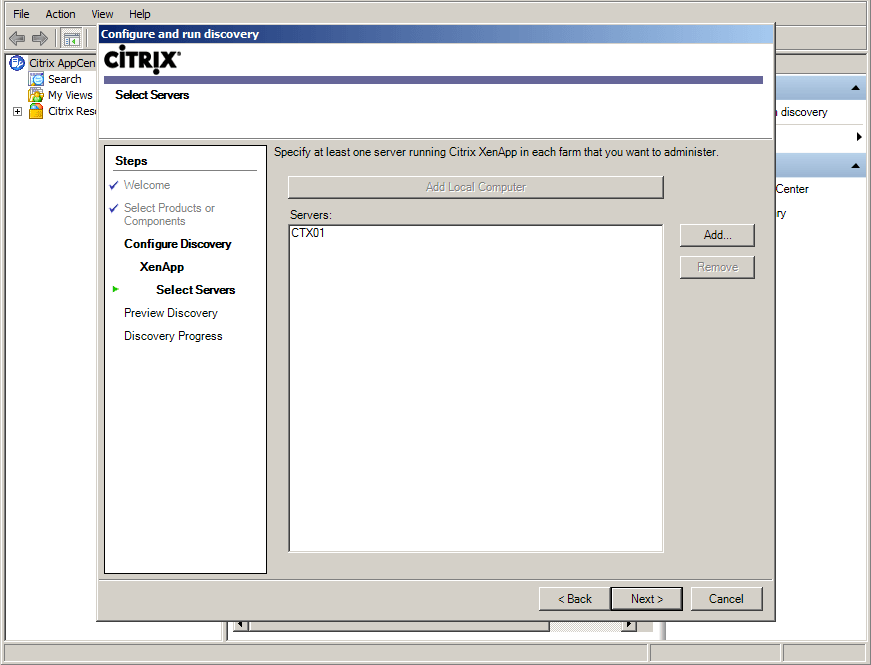
24. Reboot the box before you start publishing applications.

25. After reboot open Citrix AppCenter by clicking on start, administrative tools, Citrix, management console and Citrix AppCenter.
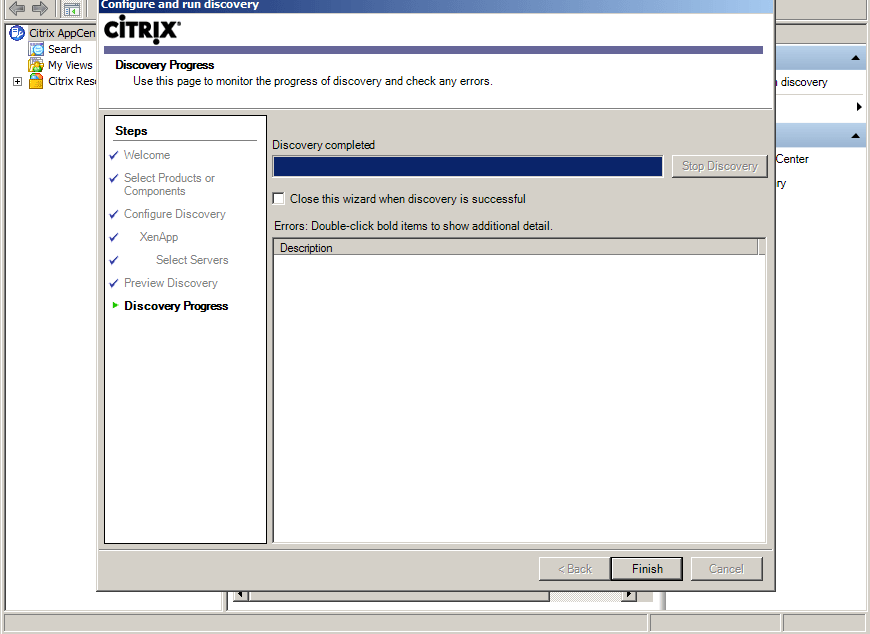
26. In “Configure and run discovery” window, click on next.
27. We are not configuring single sign-on, therefore uncheck “Single sign-on”. It can be configured by using Microsoft Active Directory Federation Services.

28. Click on add local computer, this would add the node that you want to administer. Click on next to continue.
29. Click on next again.
30. Successfully completed discovery confirms that Citrix XenApp is installed and configured successfully. In case it fails, check the status of Citrix services and ensure they all are in running state.
31. AppCenter is a console used for application virtualization. It shows the farm name that we created.

Hi, just wanted to say, I enjoyed this blog post.
It was inspiring. Keep on posting!